As an HR manager, managing all company events and employee birthdays can be real chaos. Receiving and approving event attendance requests via email and manually entering or deleting dates from a spreadsheet is incredibly time-consuming and can lead to overlap.
Looking for an automated event registration system? We’ve got a free Sheetgo template and a step-by-step guide to help you set up the system.
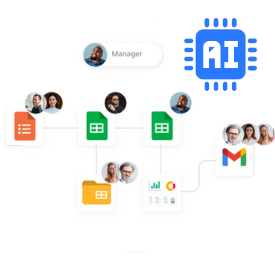
Therefore, there’s no need to buy any new software — our user-friendly, free event registration template is a complete system for G Suite. Integrating Google Forms, Google Sheets, and Google Calendar.
And the best part? Once the company events and employee birthdays are registered, they will automatically populate your company’s Google Calendar.
Take a look at our customer stories to learn more about how Latitude59 made use of this solution to manage all of their event data in Google Sheets.
The event registration form template is ready to use — we’ve written the script for you.

How the Event registration form template works
- Send the event registration form to anyone who might need to add any company events/birthdays.
- The form responses will automatically be entered into your spreadsheet.
- Run the script once to automatically put these events in your company’s Google Calendar in the future.
Ready to automate events and birthday registration in your company’s Calendar?
Then here’s how to get started:
Step 1: Install the template
Get a copy of the Events registration Form template here. The template consists of an Events registration form and an Events management spreadsheet that will automatically accept or deny the events requested by your team members.
As a result, inside the event tracking spreadsheet, your team’s birthdays and planned events will automatically appear in the 2020 tab.

Step 2: Connect your Google Calendar to the template
This template automatically updates your Google Calendar directly from the Form responses in the Google Sheets. In other words, our Google Apps Script takes inputs from the spreadsheet and automatically creates Calendar events. Moreover, we configured the script to execute once a day. In other words, any changes made to the spreadsheet will be automatically reflected on the calendar within a day. Therefore, it minimizes manual work and eliminates errors. It’s a one-time setup.
As you can see, this is a great productivity hack. You stop wasting time scheduling and coordinating events amongst your team. Below are the step-by-step instructions to configure the script for your company.
Create a new Google Calendar
Firstly, open your Google Calendar and create a new calendar (to share with your team).

Copy the Calendar ID
Secondly, copy the calendar ID by selecting Settings and Sharing, scrolling down to Integrate Calendar, and copying the calendar ID.

Sign up for Sheetgo and start tracking worked hours automatically
Add Calendar ID to spreadsheet
Finally, in your Events management spreadsheet, go to the Parameters tab and fill out the following:
Step 3: Configure your template timezone
The next step to make the system work is to set the time zone on your spreadsheet template to the current time zone. Click on File > Spreadsheet settings > General > Timezone. By doing so, the system records your spreadsheet in the specific timezone and affects all time-related functions.

Step 4: Use your template
To use your system, send the form to your team. Open your Events management spreadsheet and click on Form -> Send Form. Or update the Form yourself with company events and employee birthdays.
After that, click on the menu Events register > Run. This automatically adjusts your Calendar in the future.
Done — your event tracking system in G Suite is up and running!
That’s it!
Now you have a clear overview of all company events and birthdays in your Google Calendar. Are you interested in automating more HR processes? Please review our Holiday tracking template. It works similarly to this template. Your employees request days off, which get approved or denied, and are automatically added to your company’s Calendar.
Start tracking worked hours automatically