




It’s common for any Excel user to password-protect an Excel file, especially if your file contains complex formulae where cells are interlinked. You’ll want to avoid accidental edits that can break any formulae and distort your data completely. Although password-protecting is the best way to keep your data safe, managing to remove the password from Excel or read-only status can become a tedious task if you have forgotten the password.
Thankfully, Excel includes the Visual Basic for Applications (VBA) solution, which allows you to complete this process more quickly and efficiently. In this article, you’ll learn how to protect a sheet from Excel’s Review tab, then how to write VBA codes and use them to protect and unprotect an Excel sheet, with and without a password. If several people share and update the same Excel files, Sheetgo’s AI automations can move the data between them, so fewer people need to edit the protected source sheet.
How to protect a sheet in Excel from the Review tab
You don’t need VBA to protect a single sheet. Excel has a built-in option for it:
- Open the worksheet you want to protect.
- Go to the Review tab and click Protect Sheet. You can also right-click the sheet tab and choose Protect Sheet.
- Type a password if you want one. Leave the field blank to protect the sheet without a password.
- Under “Allow all users of this worksheet to”, tick what people can still do, such as selecting cells or formatting columns.
- Click OK. If you set a password, type it again to confirm.
Every cell is locked by default, so protection covers the whole sheet. To keep some cells editable, select them before you protect the sheet, press Ctrl+1, open the Protection tab, and clear the Locked box.
To unprotect the sheet, go to Review > Unprotect Sheet and type the password if Excel asks for it. The sections below do the same with VBA, which saves time when you have several sheets to protect.
How to enable the Developer tab in Excel?
Before learning how you can protect an Excel sheet without a password using VBA, make sure you have the “Developer” tab enabled for easier access.
1. Open the Excel sheet you’d like to protect without a password. Go to File > Options.
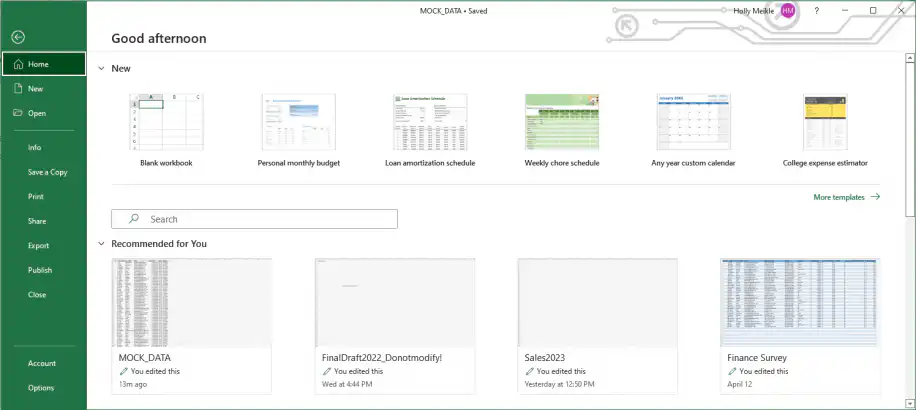
2. Select “Customize Ribbon” from the left-side menu. The “Developer” option should appear as selected, as shown below. Click “OK” to finish.
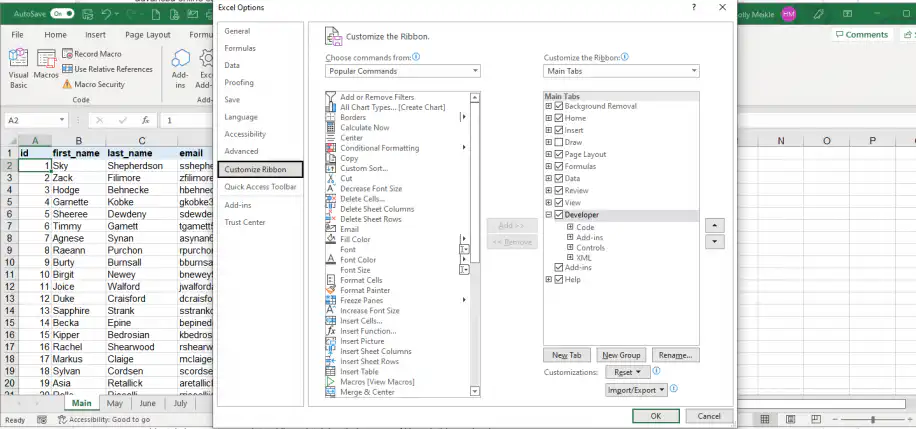
3. You should now see an additional tab in your Excel named “Developer”. Select “Visual Basic” from the far left, to launch VBA.
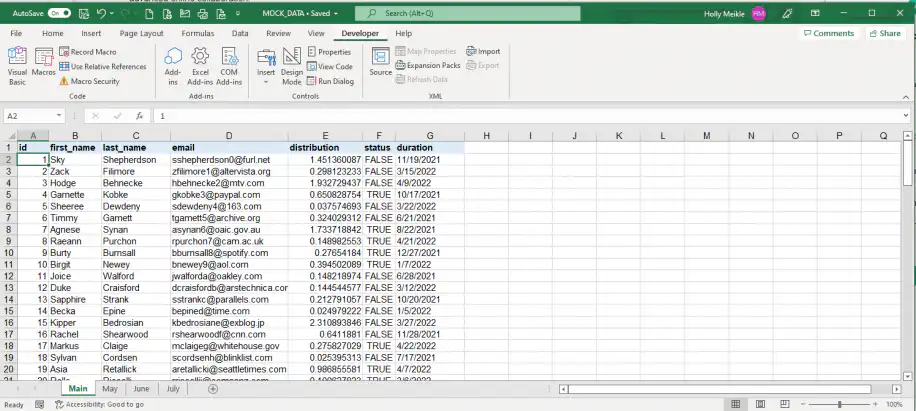
4. The VBA Editor should show up automatically, as illustrated below.
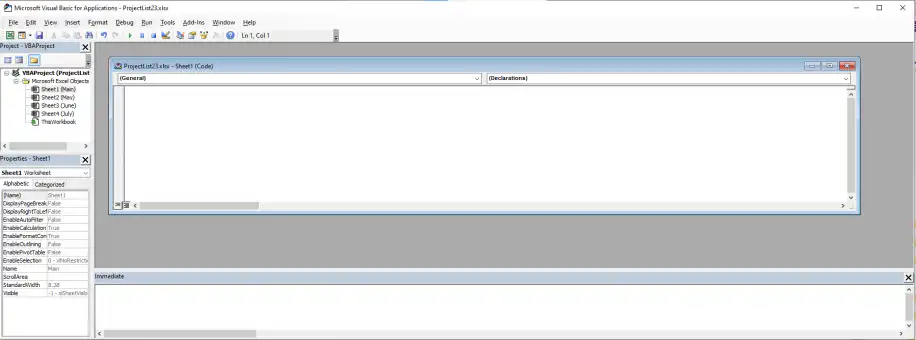
Protect a sheet without a password with VBA
Protecting a sheet without a password is a simple way of restricting others from making accidental changes to your data while maintaining their access. Although this can be done manually if you only have one sheet to protect, it will become a tedious process if you have more than one sheet that needs to be protected. For enhanced protection and code management, you might also consider using tools for code security.
1. Launch the VBA solution as shown and enter the following code in the first window.
Here, “ProjectList23” and “Main” are the variable parameters that you’ll need to adapt to the name of your workbook and worksheet.
2. Press “Enter” to execute the code.
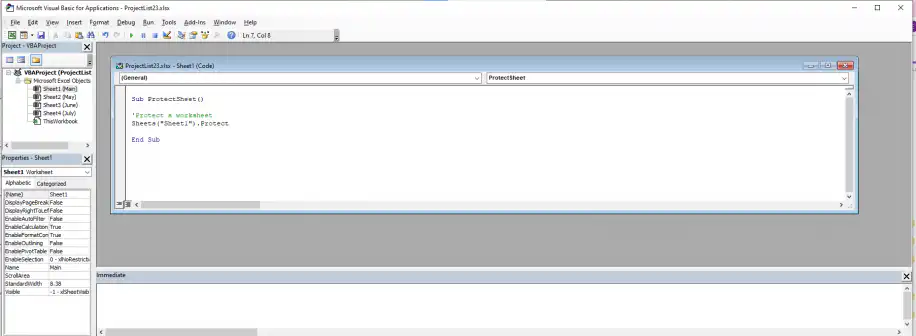
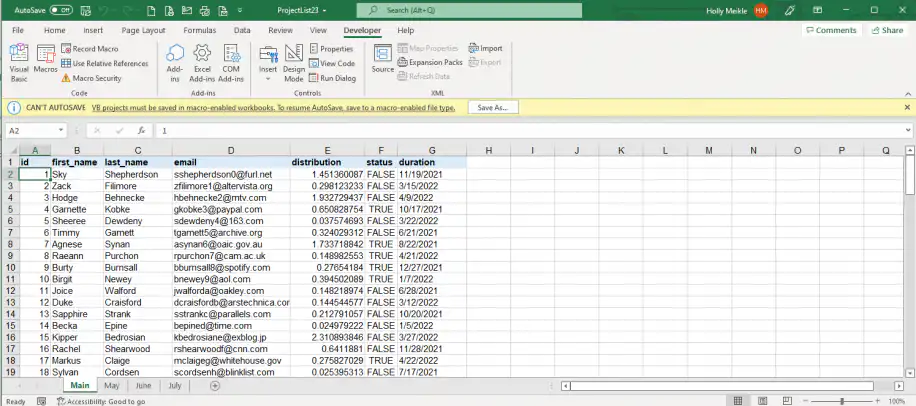
3. Excel may prompt you with the following “Can’t AutoSave” warning message. Select “Save As…” to change the format of the current file.
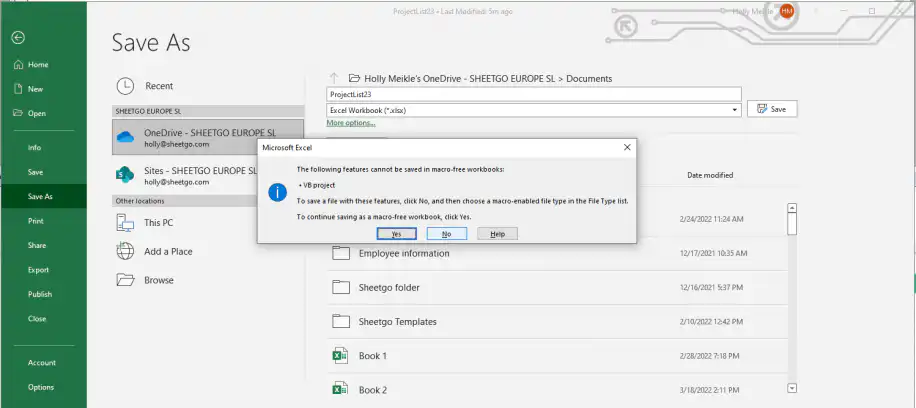
4. If you try to “Save” directly, it will once again provide you with features that are incompatible with this type of format. Click “No”.
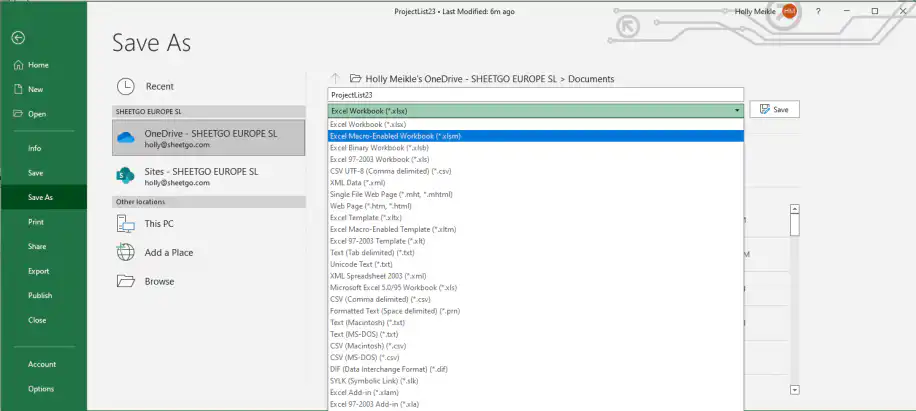
5. Change the format by selecting “Excel Macro-Enabled Workbook (*.xlsm)” from the drop-down menu next to “Save”. Click “Save” to finish.
6. You can now check if your sheet is protected by heading to the “Review” tab. It should now say “Unprotect Sheet”.
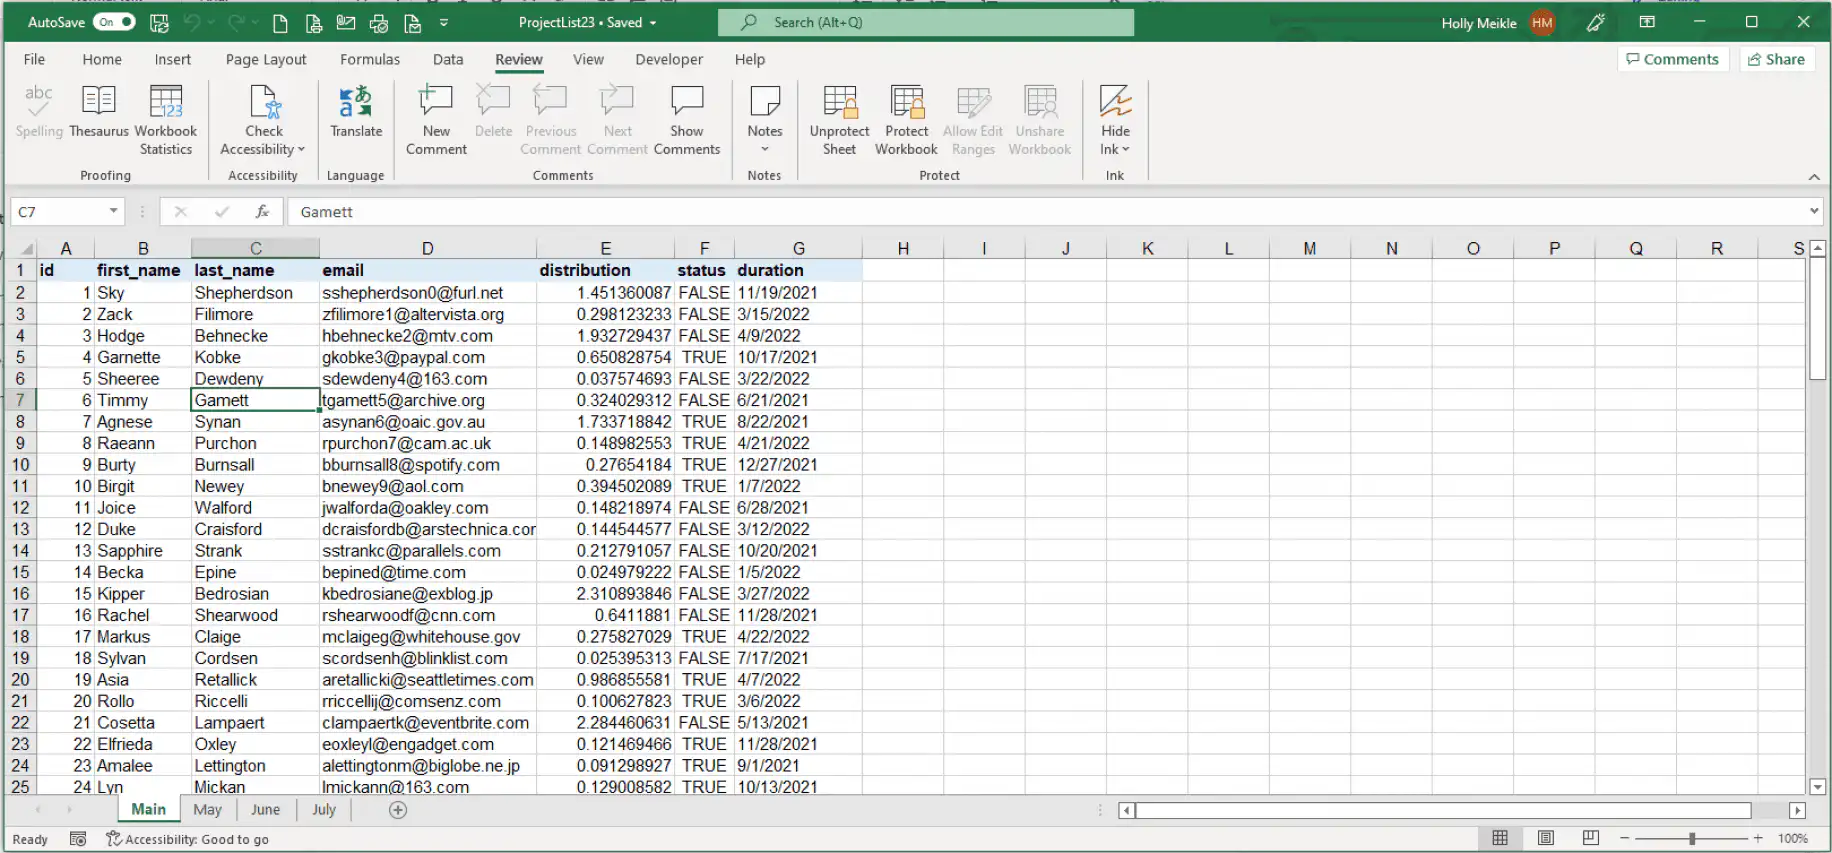
Now, you’ll learn how to do the reverse process using VBA.
Unprotect a sheet without a password with VBA
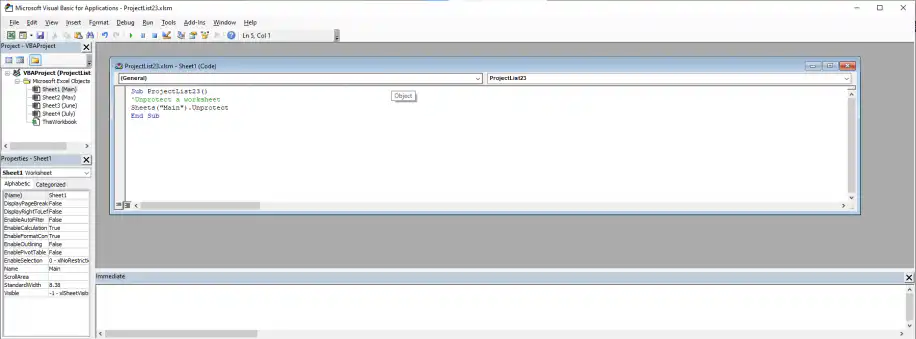
1. Launch VBA and type in the following code, once again adapted to the name of your file and sheet.
2. Check to see if your sheet is now unprotected by heading to the “Review” tab. It should now say “Protect Sheet”.
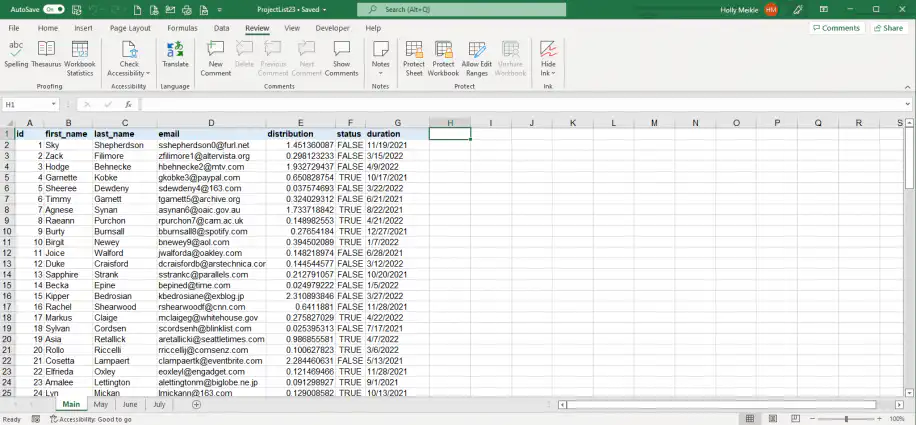
So far, you’ve seen how to protect and unprotect a sheet without a password. If your data requires an additional level of protection, you can add a password using a similar VBA solution.
Protect a sheet with a password with VBA
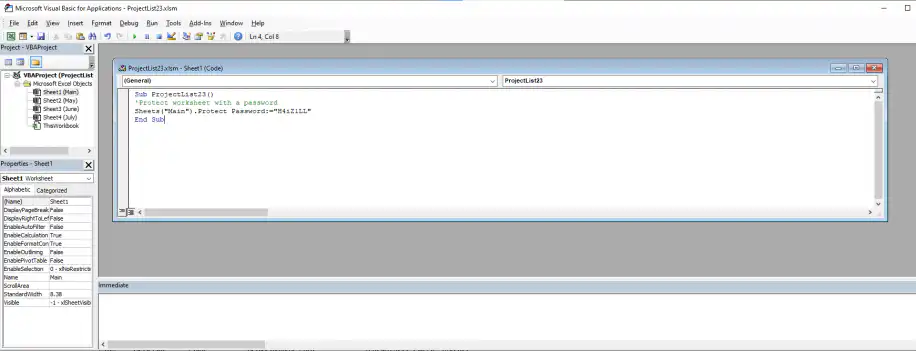
Similar to what you did previously, this method will require using a straightforward code adapted to the name of your file, sheet, and then your choice of password.
1. Open the Excel workbook and activate the sheet you want to password protect with VBA. Type in the following code:
2. To check that the code ran successfully, try clicking on any cell in the password-protected sheet. Excel should prompt you with the following message.
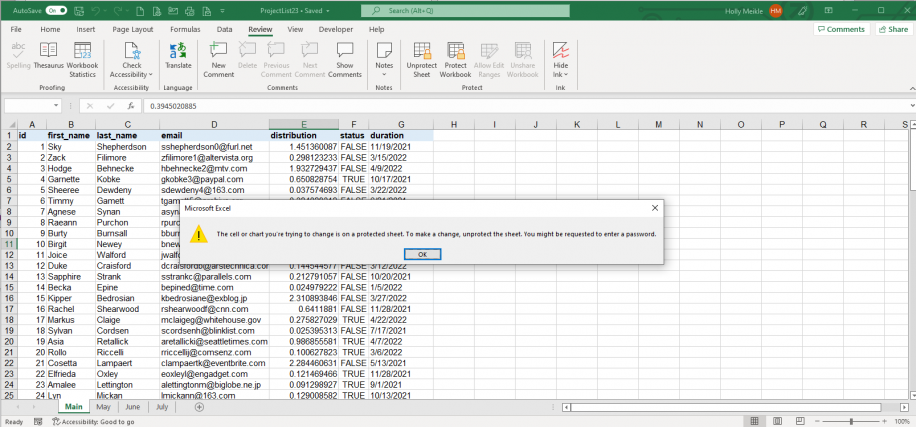
Instead of entering the password, let’s see an easier way to unprotect the sheet using VBA.
Unprotect a sheet with a password with VBA
1. Open the Excel workbook and the sheet you want to unprotect. Type in the following code to remove the password.
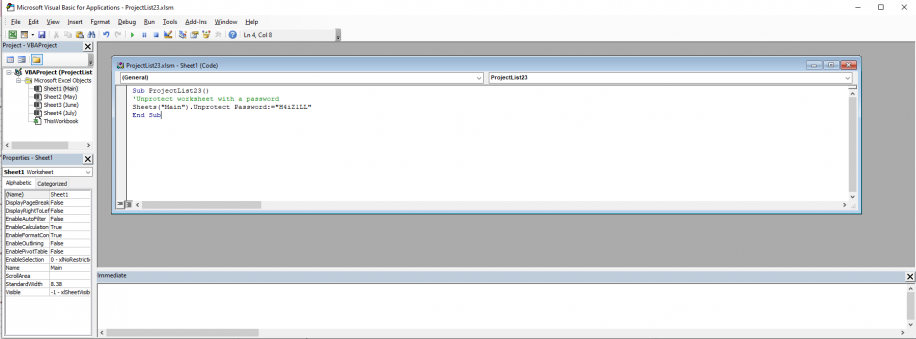
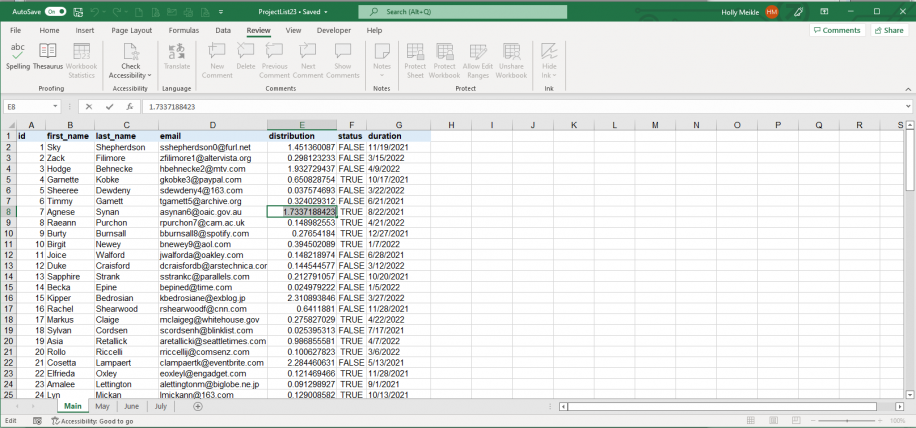
2. Check that the code ran successfully by heading to the Excel sheet and double-clicking on any cell. It should now allow you without prompting any warning or error message.
Although the codes shown are straightforward enough, you can also use the parameter activesheet.unprotect password and activesheet.protect password instead of the sheet name. You will simply have to make sure that the sheet you’d like to protect and unprotect is active.
Moreover, the code can adjust to the type and level of protection. For example, the VBA protect sheet code allows you to select locked cells to unprotect. This is very useful as they help speed up daily tasks, which can then be recorded as an Excel macro that you can run at any time instead of unlocking cells manually.
Conclusion
No matter the size or complexity of your dataset, if you are an Excel user, you’ll find that learning about VBA is definitely a plus. With basic and straightforward coding, you can save time completing daily and necessary tasks that usually take up most of your time. For example, protecting specific data to avoid losing data or breaking complex formulae.
You should now know how to enable quick access to VBA through the “Developer” tab and how to use four different VBA codes to protect and unprotect sheets in Excel, with and without a password.
If you prefer working on Google Sheets, then you may find how to password-protect a Google Sheet more suitable.



 English
 Español
 Português do Brasil
 Français