




Whether you are using Excel or Google Sheets, spreadsheets have become a key tool for collaboration. That is until accidental (or even purposeful) edits occur, which negatively impact your entire dataset.
Imagine arriving at your Excel spreadsheet to resume your work from the day before, except nothing looks like how you left it. This is the point where you probably wish you could turn back time or at least have protected the work you had done so far. Knowing how to lock cells, a sheet or a formula in Excel is extremely useful in these cases. Moreover, knowing how to unlock cells in Excel is just as important since you may wish to make some parts of the document editable again.
By the end of this article, you will know how to lock specific cells, shared files/sheets, and formulas in Excel. So, without further ado, let’s explore these methods to ensure that you maintain control over your hard work.
How to lock cells in Excel?
In simple terms, when you lock a cell in Excel, other users are automatically restricted from making changes to that information. As mentioned before, in cases where a spreadsheet will be modified or edited by several people, it will make everyone’s life easier if you either prevent them from changes or pre-approve specific users.
1. First of all, you need to select the cells that you want to lock.
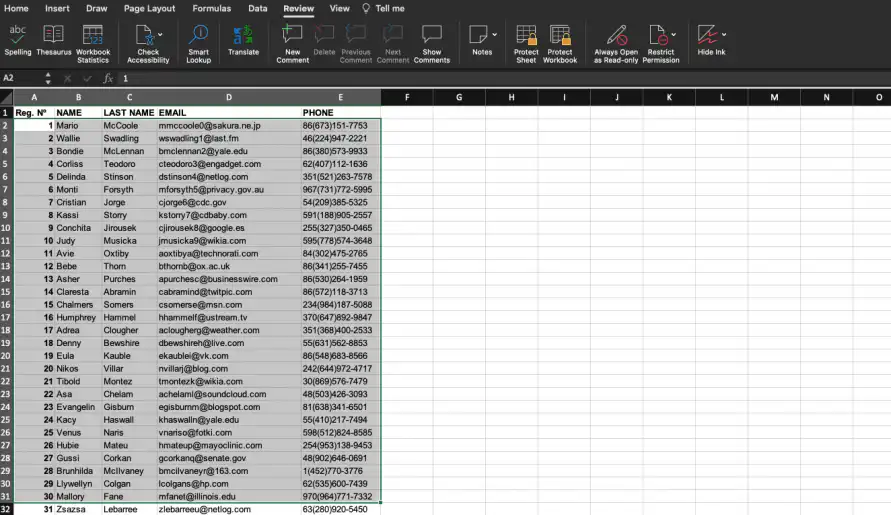
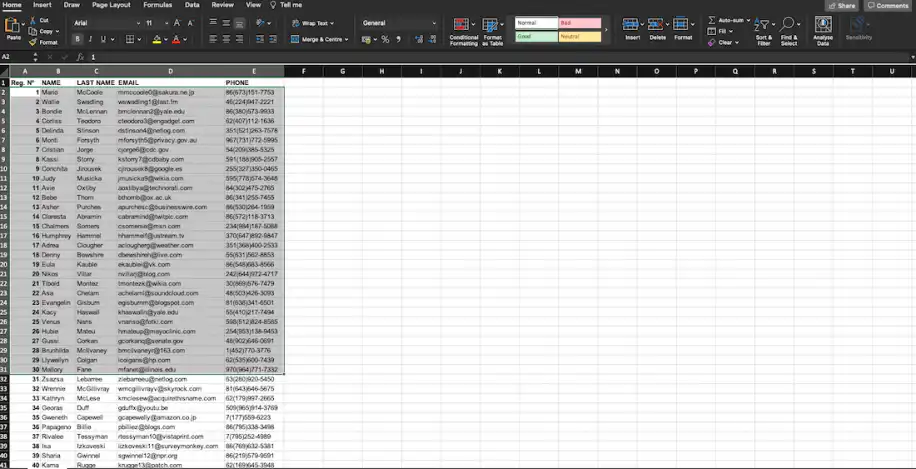
2. Go to the “Home” tab of your Excel sheet and select “Format” to the far right.
3. From the drop-down menu, choose “Lock Cell”.
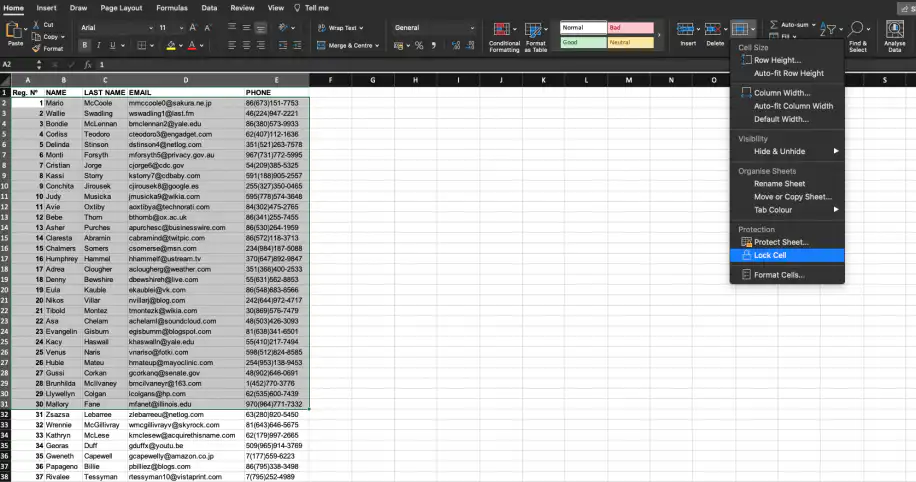
IMPORTANT: Although your selected range is now locked, it is still editable. This is because the sheet itself has not been protected. If you wish to prevent others from editing the content in these cells, you need to proceed to the following section.
How to lock a sheet in Excel?
In order to lock a sheet in Excel, you simply have to use the protect feature in the spreadsheet app. Please note that in order to lock a sheet in Excel, the previous steps have to be completed.
1. Go to the “Review” tab and select “Protect Sheet”.
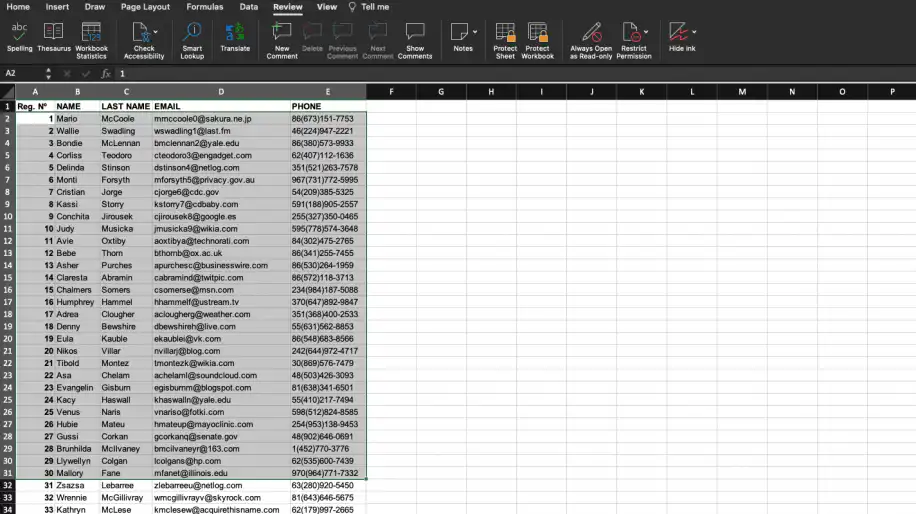
2. A small window should pop up which will allow you to protect the sheet and its corresponding contents by optionally setting a password or directly ticking the permissions you would like to grant users on this sheet.
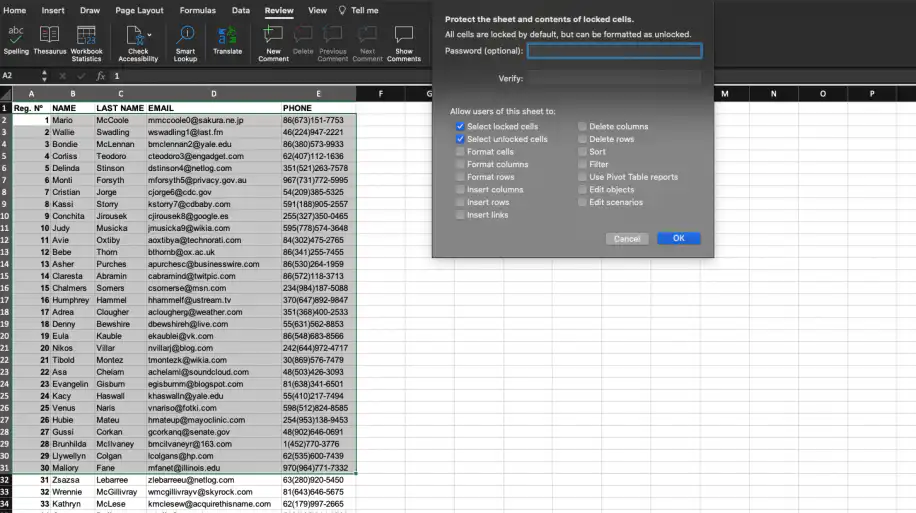
IMPORTANT: By not protecting with a password, any of the users having access to this sheet are able to click on the “Unprotect Sheet” option and make the changes they want. You can learn more about password protection in our two blog articles on how to password protect an Excel file and how to password-protect a Google Sheet.
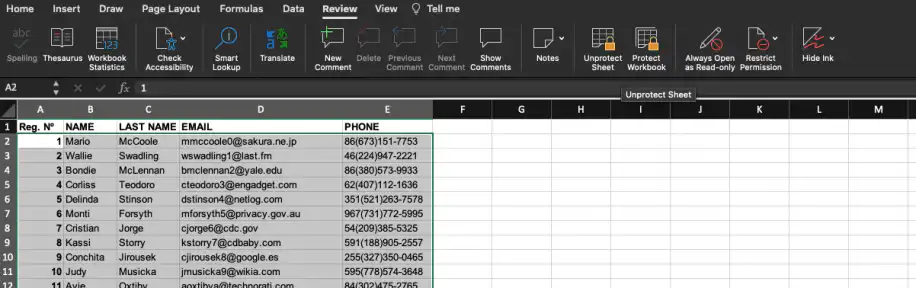
3. Lastly, to make sure you have successfully locked cells, you can check to see if the “Unprotect Sheet” option appears in the Review toolbar.
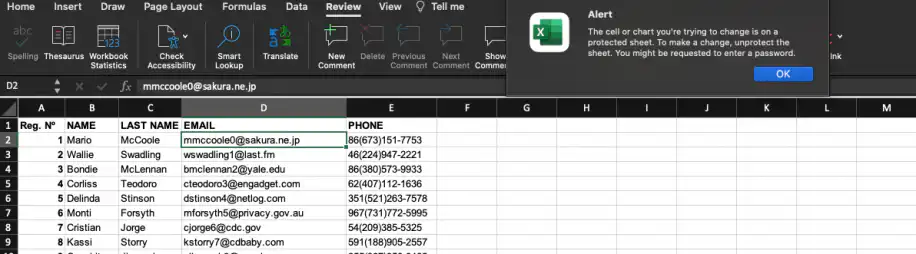
4. Another way to see if this has worked is to type directly in the locked cell. If you were successful, you will get the following alert message.
Remember that you do not need to password protect the whole sheet to lock specific cells or content ranges in your spreadsheet. As shown in the list of lockable items above, you can also restrict users from formatting, sorting, or filtering content in the cell(s).
In the next section, you will learn how to narrow your locking range to a single cell instead of a column, row, or specified range.
How to lock specific cells in Excel (and keep the rest editable)?
Sometimes, you will need your team to continue working on or updating the content of a spreadsheet and will have to limit the locked content to a minimum. This is where locking specific cells comes in handy. But, before we continue, make sure you click “Unprotect Sheet”.
1. Before you begin, make sure that you click “Unprotect Sheet” in the Review toolbar. Every cell in Excel is locked by default, so unlock the whole sheet first: press Ctrl+A (Cmd+A on Mac) to select all cells, open Format Cells, and untick “Locked” on the Protection tab.
2. Select the cell(s) you wish to lock and press “Ctrl+1” on Windows or “Cmd+1” on Mac to launch the “Format Cells” window. Note how in this case, I have only selected the first seven email addresses.
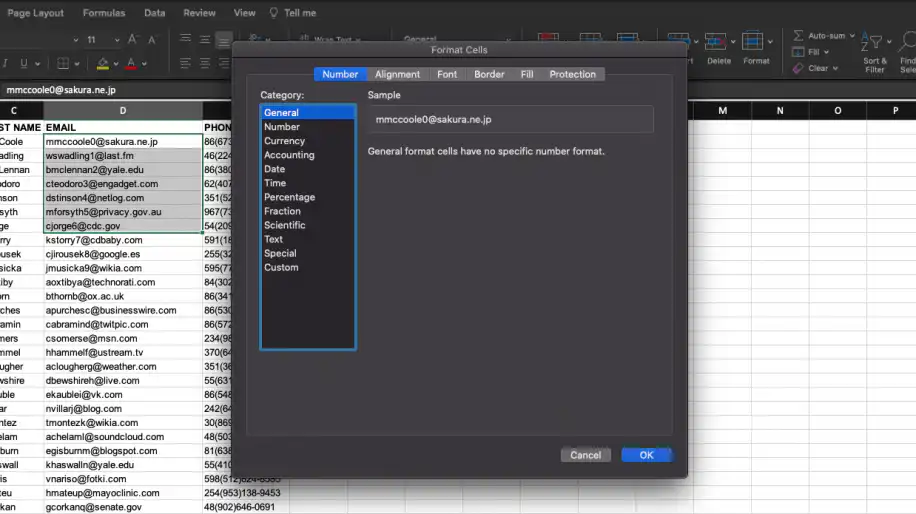
3. Go to the “Protection” tab and make sure the “Locked” option is ticked before clicking “OK”.
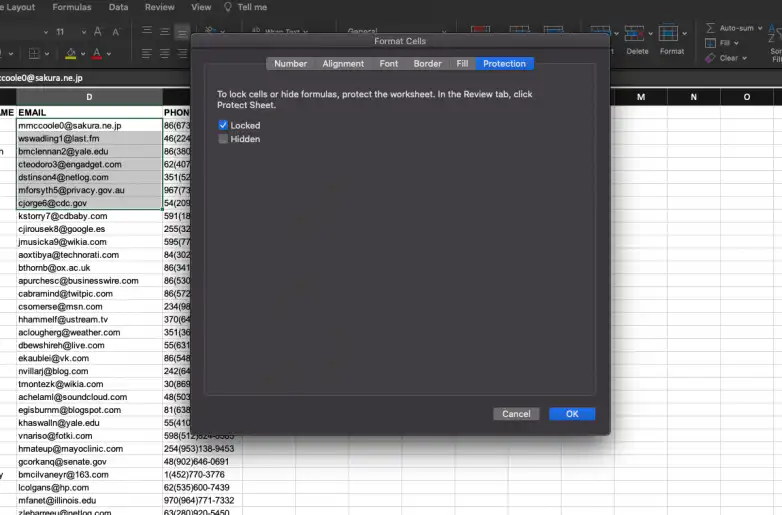
4. Go to the “Review” tab and click “Protect Sheet”. Only the cells you locked are protected now, and people can still edit the rest of the sheet.
This shortcut to locking cells in bulk will make it easier to protect the data you want to remain intact. The next section will explain how to lock a cell in Excel that contains a formula.
How to lock formulas in Excel?
In many circumstances, you may have formulas in your Excel to handle important calculations of data. If these cells containing the formulas are changed (accidentally or not), not only will the cell be affected, but the row, column, or even the entire sheet.
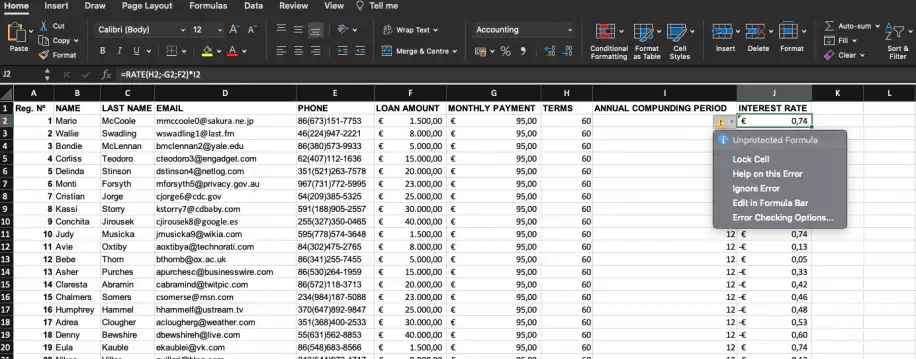
1. A formula cell that is unprotected will showcase a small green triangle on the top-left corner as well as a warning sign.
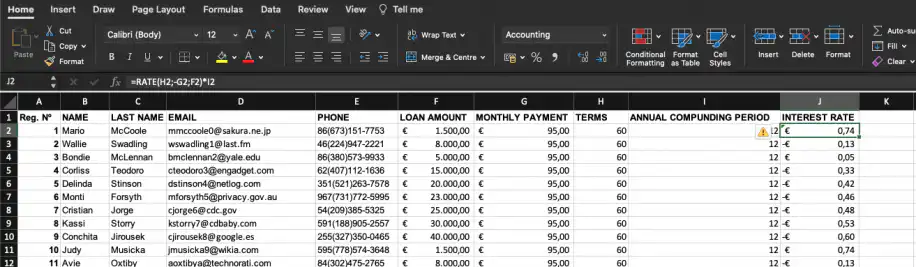
2. Click on the warning sign icon and select the option “Lock Cell” from the drop-down menu.
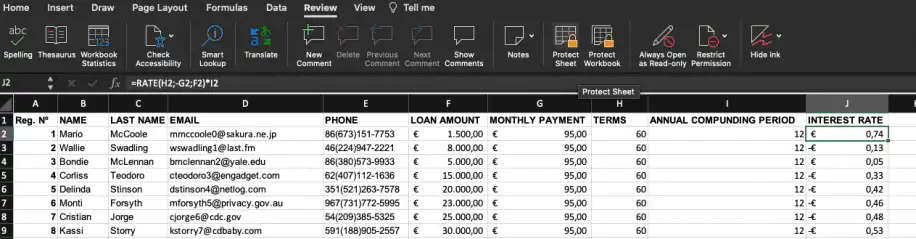
3. Similar to the steps on How to lock a sheet in Excel, go to the “Review” tab and click on “Protect Sheet” to protect the formula.
You may also protect the formula by locking the specific cell formulas in your sheet, using the same steps on how to lock specific cells in Excel. To select every formula on the sheet at once, open Find & Select on the Home tab, click Go To Special, choose Formulas, and click OK.
Sometimes “locking a cell in a formula” means something else: keeping a cell reference fixed when you copy the formula to other cells. For that you need an absolute cell reference. Add a $ sign before the column letter and the row number (for example, $A$1), or click the reference in the formula bar and press F4 on Windows or Cmd+T on Mac.
Conclusion
These locking methods in Excel are vital to ensure your spreadsheet data is safe from unwanted changes. Learning how to lock cells, sheets, or formulas within Excel will help you avoid any risk of having to edit mistakes manually down the line, which can end up becoming extremely time-consuming and unproductive.
By the end of this article, you should know how to lock cells, specific cells, cell formulas, and protect sheets, including passwords, in Excel.
If your team also works in Google Sheets, see how to protect cells or pages in Google Sheets. When several people need the same numbers, you can keep the source workbook locked and let Sheetgo’s AI automations copy the data into the files each person edits.



 English
 Español
 Português do Brasil
 Français