


Google Sheets and Excel are both everywhere, so even if your team works in Google Sheets, sooner or later a client, colleague, or supplier will ask you for an Excel file. If you’re still choosing between the two, our Google Sheets vs Excel comparison covers the differences.
For a one-off file, you don’t need a converter, because Google Sheets saves a copy as .xlsx in a few clicks. When the Excel file has to stay current, a connection that updates it on a schedule works better. This guide shows you how to convert Google Sheets to Excel both ways: manually first, then automatically with Sheetgo, an AI-powered data automation platform.
How to convert Google Sheets to Excel manually
Follow the steps below to download your Google Sheets as Excel files. You can do so from the Sheets site or from Google Drive. Let’s see the first method.
Download a Google Sheet as an Excel file
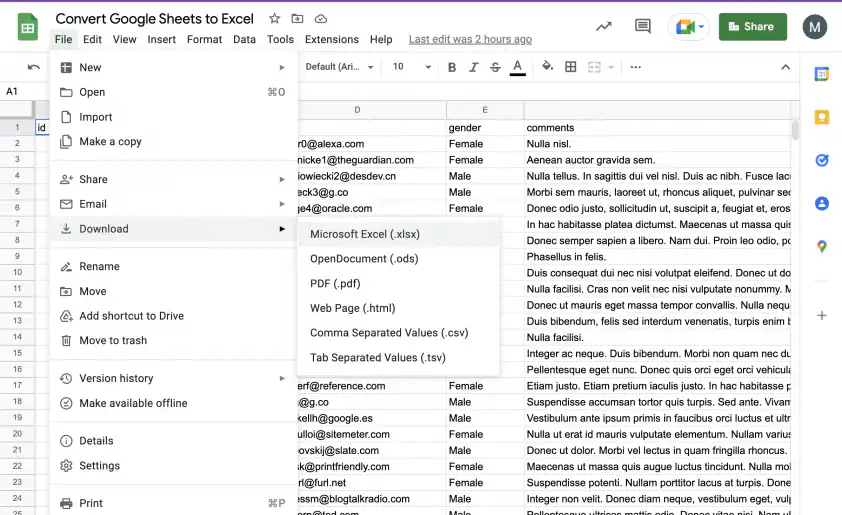
1. Open your Google Sheets and go to File > Download > Microsoft Excel (.xlsx).
2. In the standard “Save” window, click on the folder where you’d like to save the Excel file.
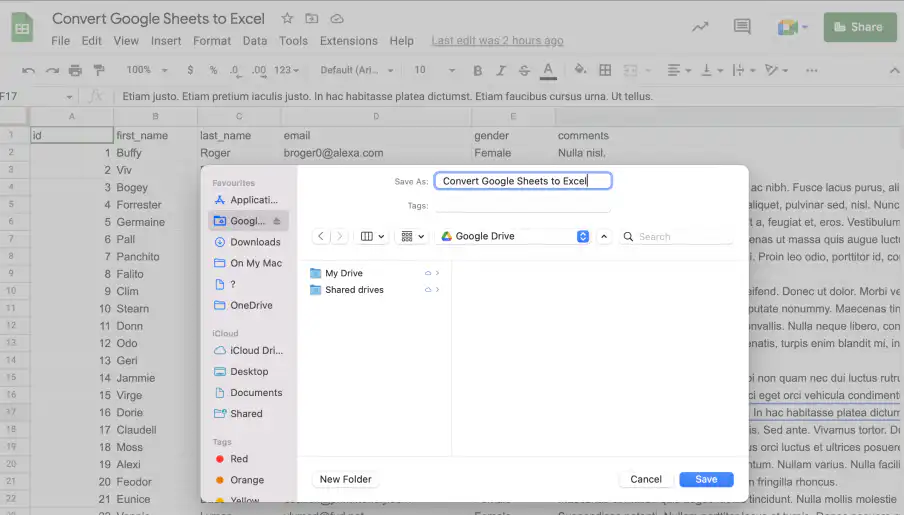
3. Go to the file location and double-click to open. You should now be able to open it directly in Excel.
Export Google Sheets to Excel from Google Drive
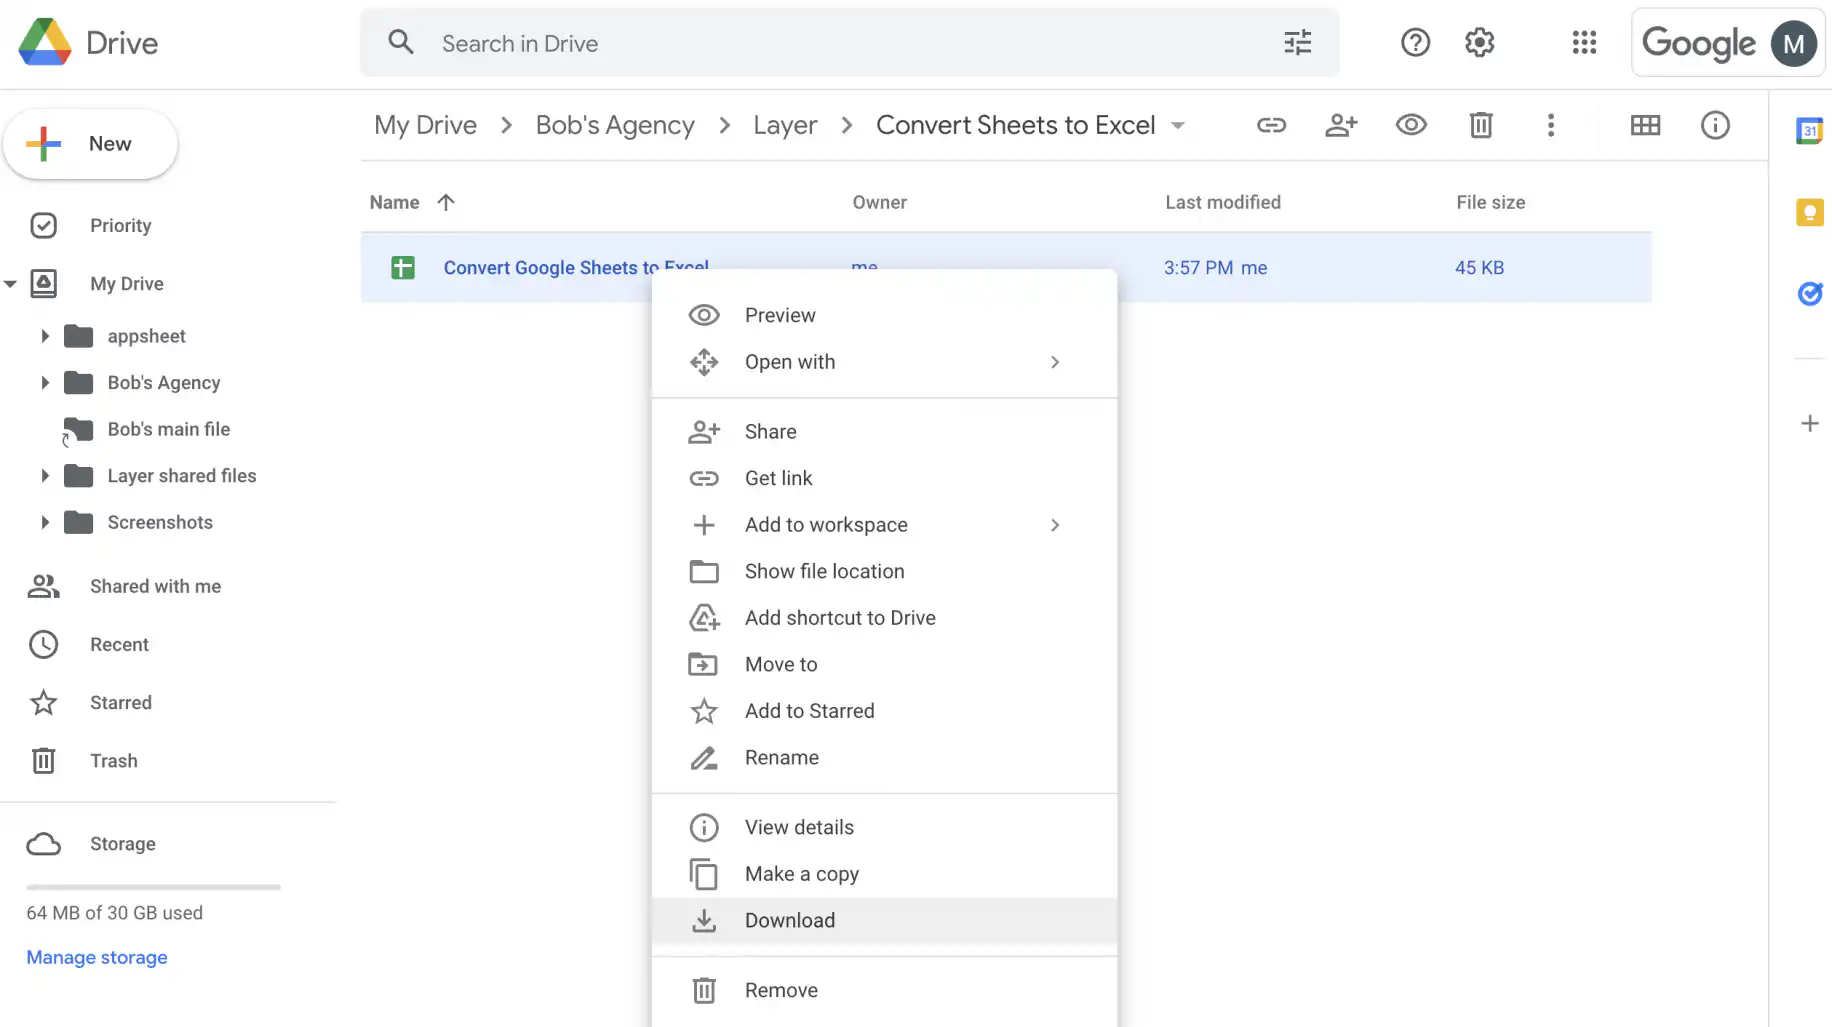
1. In your Google Drive, right-click on the Google Sheets file and choose “Download”.
2. The file is automatically converted to Excel format. You will be able to choose where to save the file from the standard “Save” window for your OS.
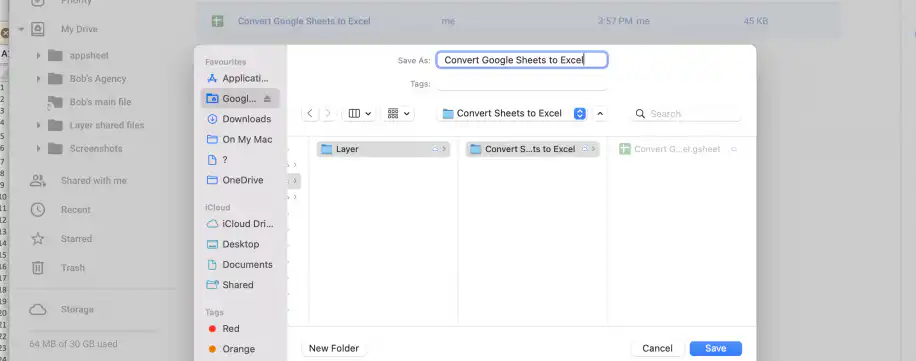
3. That’s it. The file can now be opened directly in Excel.
What to check after converting
Before you send the Excel file, open it and check for these known issues:
Formulas: functions that only exist in Google Sheets, such as IMPORTRANGE, GOOGLEFINANCE, and QUERY, have no Excel version, so in the downloaded file those cells keep their last value and stop updating.
References: if there are references to external data in your spreadsheet, remember to check whether they have been modified or corrupted during the transfer.
Dynamic arrays: formulas that fill a range, such as ARRAYFORMULA, FILTER, UNIQUE, and SEQUENCE, can show a #SPILL! error in Excel, with stale numbers in the cells they should fill. Older versions of Excel show #NAME? for functions they don’t have, such as FILTER and UNIQUE in Excel 2019. Our ARRAYFORMULA guide explains how these formulas work in Google Sheets.
How to convert Google Sheets to Excel automatically
While the manual method works well for ad-hoc conversions, if you need to update your file regularly, this method becomes unsustainable very quickly. Not only is it tedious and time-consuming, but it can also lead to data loss and multiple versions of the ‘.xlsx’ file. Each time the data changes, you download the file again, save it to the right folder, or email a fresh copy to whoever needs it. You can automate that with a script or with a connection that keeps the Excel file in sync.
With Google Apps Script
If you know Google Apps Script or JavaScript, you can write a script that exports your sheet as an .xlsx file. These two guides have code you can adapt:
- Spreadsheet Dev: a guide on how to export a Google Sheets spreadsheet into other file formats using Apps Script.
- Digital Inspiration: a post titled Convert Google Sheet to Excel XLSX Spreadsheet.
A script still repeats the manual download, though. Each run overwrites the previous version, and if someone has the file open while the script runs, you can end up with two copies.
Why sync Google Sheets to Excel?
To solve these problems, you can connect Google Sheets to Excel with Sheetgo. This lets you:
- Sync Google Sheets to Excel
- Export Google Sheets to Excel automatically
- Skip the routine downloads and file saving
- Keep your Excel files up to date
- Transfer only the data you select from Sheets to Excel
- Prevent file conversion errors
Watch the video to see the steps.

Sync Google Sheets to Excel with Sheetgo
Sheetgo is an AI-powered data automation platform that transfers data between different spreadsheet formats automatically. In a few clicks, you can link Google Sheets to Excel and send data from one spreadsheet to the other. Whenever you change the data in the Google Sheets file, the connected Excel file gets the update.
Follow the steps below to get started:
Step 1: Open Sheetgo
Open Sheetgo and sign in.
As you can see, you have the option to sign in with your Microsoft, Google, or Dropbox account. You can connect files stored on any of those cloud storage platforms.
In the following example, I’ll show you how to sync a Google Sheets file stored in Google Drive to an Excel file stored in OneDrive.

Step 2: Select your Google Sheets file
Inside Sheetgo, click on New workflow to get started. Then, click on Create a connection to start building your Google Sheets to Excel conversion system.
- Give your Untitled workflow a name at the top of the screen. Here I’ll call it Google Sheets to Excel.
- Under Source, click on Select file.

Select the Google Sheets that you want to export data from.

Under File tab, make sure to select the correct source tab (sheet) from the dropdown menu if your spreadsheet contains multiple tabs.
Step 3: Select a data processor
When you have selected your Google Sheets source file and tab, scroll down and click the Next step button.
Now you can select a data processor.
Select Filter if you want to transfer filtered data from Google Sheets to Excel.
Select Split if you want to split data into multiple Excel sheets.
When you select multiple source files, you also have the option to merge data from these Google Sheets to a single Excel spreadsheet.
In this case, as we only want to transfer data from Google Sheets to Excel, click Skip to move on to the next step.

Step 4: Select your Excel file
After selecting your data processor, you need to choose your destination file.
Select Excel as your file type.

You can either ask Sheetgo to create a new file or choose an existing file.
I will ask Sheetgo to create a new Excel file.
Sheetgo will transfer your Google Sheets data to a new worksheet in the destination Excel file.
Now you can name your new file and the file tab.
Step 5: Create the connection
Click on the blue Finish and save button to create the connection. Sheetgo will now convert Google Sheets to Excel.
Sheetgo transfers the data from the selected source tab in your Google Sheets file to the new tab in your destination Excel file.
Click on Workflow to see how your files are connected.
Check out your imported data
From the Workflow or Files menu, double-click on the Excel file to open it in a new tab in your browser.
You will see that it contains a new tab (worksheet) with the imported data from Google Sheets.

Step 6: Update the connection to sync the files
Now that you have created the connection, you can update it at any time.
Open Sheetgo, select your workflow from the list on the left, and click Run on the menu bar.
This will refresh the data in the destination Excel file with the latest information from the Google Sheets source file.

Step 7: Automate the workflow
To make sure you always have the latest data in your Excel file, you can automate your Google Sheets to Excel connection.
- Open the workflow inside Sheetgo and click Automate on the menu bar.
- Schedule automatic updates as often as you need them.
Choose how frequently, and at what times of the day or week, you want Sheetgo to update the connection.

Keep your Excel file in sync with Google Sheets
That’s how you convert Google Sheets to Excel, syncing the two spreadsheets so that your Excel files automatically update when someone makes changes to Google Sheets.
Want to do this the other way around? Read how to upload Excel to Google Sheets automatically.
To bring data from several Excel files into one, see how to consolidate Excel files automatically.


 English
 Español
 Português do Brasil
 Français