




Regardless of the company size, anyone working with data regularly can benefit from quick and easy ways to work with data. If you work with smaller datasets, entering the data manually may be the way to go. However, what if your dataset contains thousands of rows or columns? You’re now probably wondering, can I automate data entry in Excel?
In this guide, you’ll learn the importance of using Excel data entry forms and how to create these entry forms in Excel using different features. Covering 4 different methods, you’ll learn how to create a data entry form in Excel using its built-in feature, VBA, Macros, and finally, Power Automate.
Why use Excel data entry forms?
Excel data entry forms are templates for data entry. Think of it as additional support to enter data in your spreadsheet, which can range across multiple columns and rows. It’s especially useful for those working with multiple category lists or large databases. The main reasons why you may want to use data entry forms include:
- Avoid manual errors: Input data in bulk following a structure to avoid typos that may distort your whole dataset.
- Save time: Think about having to input over 1,000 rows without making mistakes. Excel automation tools save you hours of work.
- Maintain original structure: If your data is already categorized, set the structure beforehand and place data where it should be.
- Automate processes: Create flows with Power Automate, which can “Run” automatically at specific intervals.
How do I create a data entry form in Excel?
To create a data entry form in Excel, you don’t need to learn to program or have coding skills. Luckily, Microsoft 365 includes applications and features that do the work for you. You simply need to know where to look for these tools and how to make them work for you.
How to create a data entry form using Excel forms?
To create your first data entry form using “Forms”, an Excel built-in feature, you’ll first have to add it to the Quick Access Toolbar (QAT).
How to add Excel forms to the quick access toolbar?
1. Open your Excel spreadsheet and click on the small arrow at the top, as shown below. Select “More Commands…” from the drop-down list.
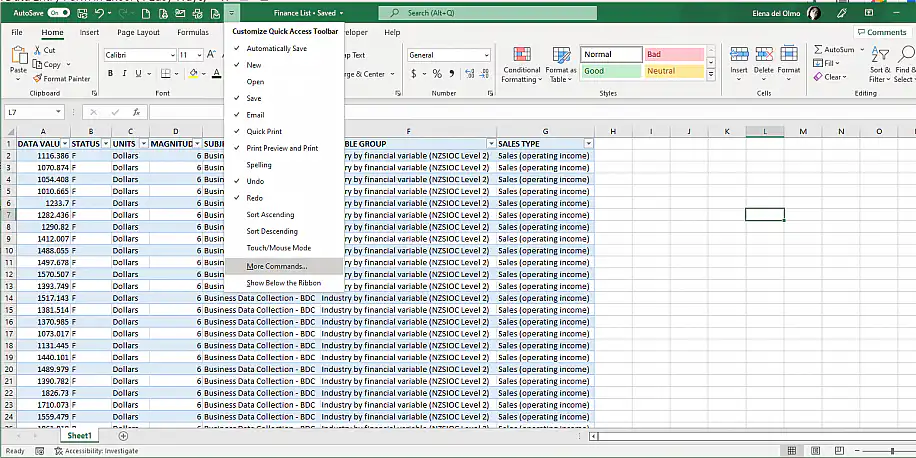
2. Select “Quick Access Toolbar” from the left-side menu, and then “Commands Not in the Ribbon” from the “Choose commands from” drop-down menu.
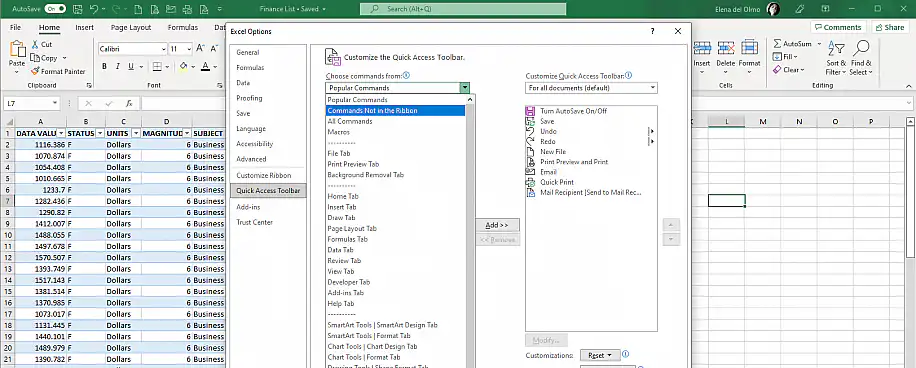
3. Scroll down the list until you find the “Form” feature and add it to your QAT by clicking on the “Add” button, placed in the center. Click “OK” to finish.
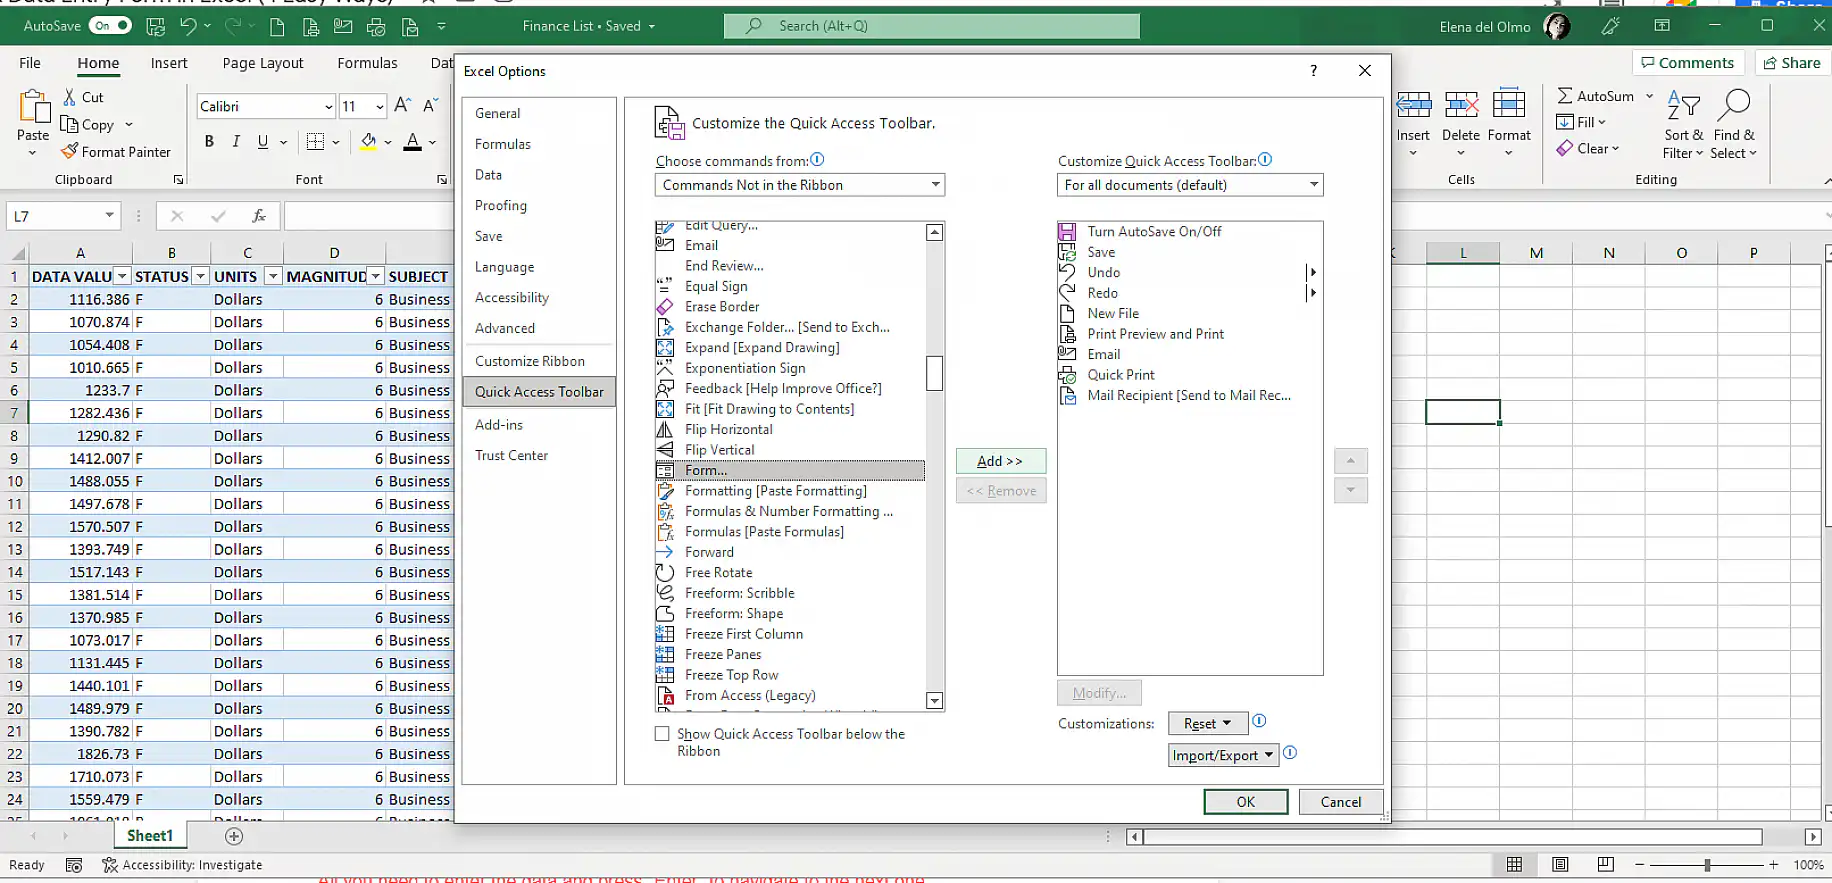
Now that it’s easily accessible, you can begin to use it.
4. Click on any row item and then the Form icon you just created, located in the green ribbon at the top of your screen.
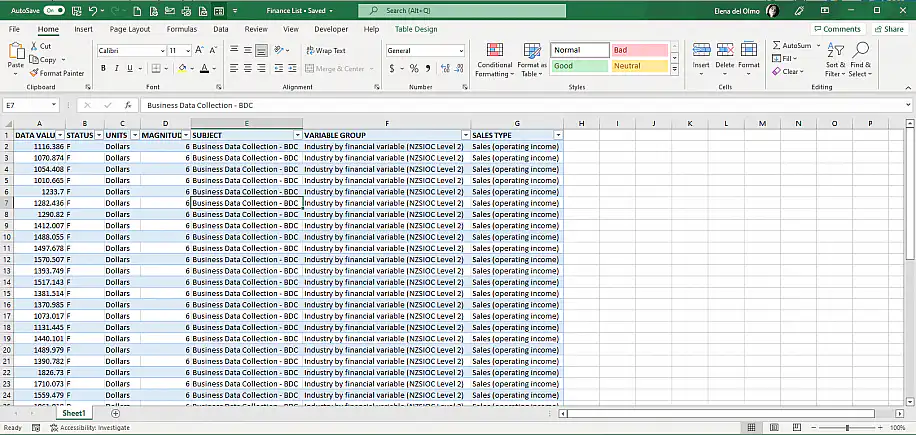
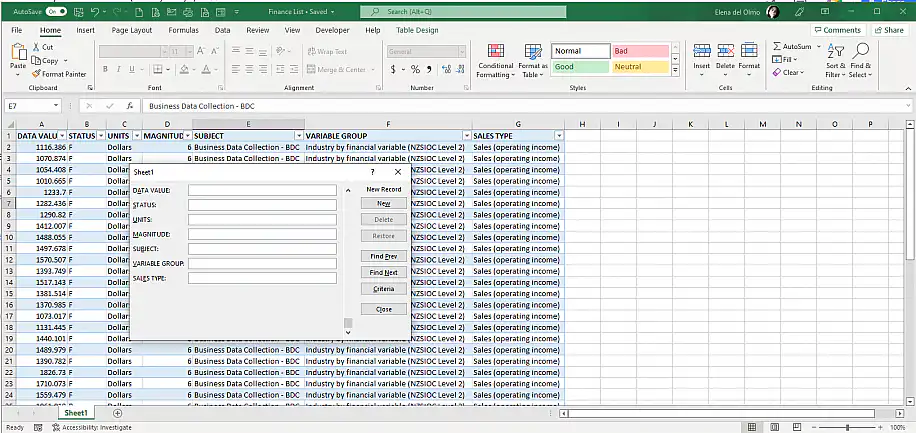
5. A window will pop up that shows the table information contained in “Sheet 1”. To the left, the form provides the column names, followed by the data already contained in the cells. To create a new data entry, aka “record”, click on the “New” button, which appears to the right.
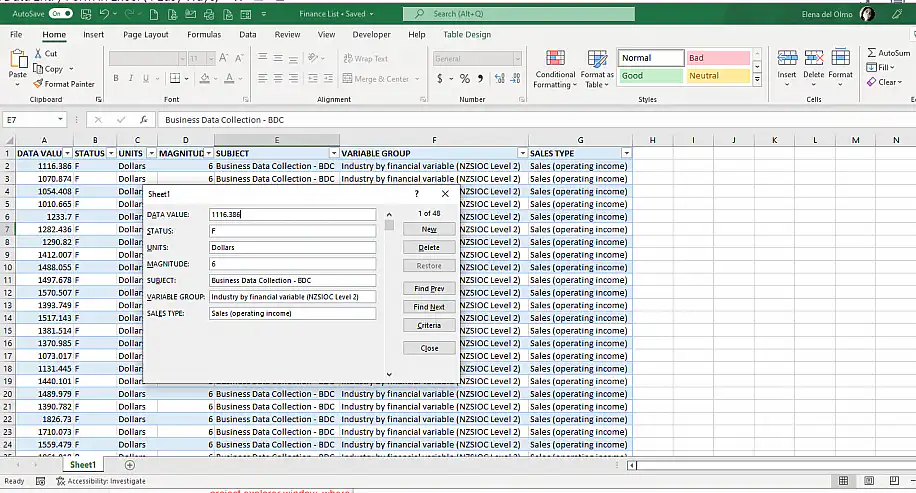
6. You can start inputting your data in the blank fields. Once you’re done, click “Close”.
How to create a data entry form using VBA?
This method is the preferred option for users that wish to create a more visual data entry form, as it makes it easier to manage all elements required to structure your data. To create a data entry form using Microsoft Visual Basic for Applications (VBA), you’ll first need to add this feature to your Ribbon for quicker access.
Add VBA to your ribbon toolbar
1. Repeat steps 1 and 2 from the previous section.
2. Select “Customize Ribbon” from the left-side menu and then “Main Tabs” from the “Customize the Ribbon” drop-down menu to the right.
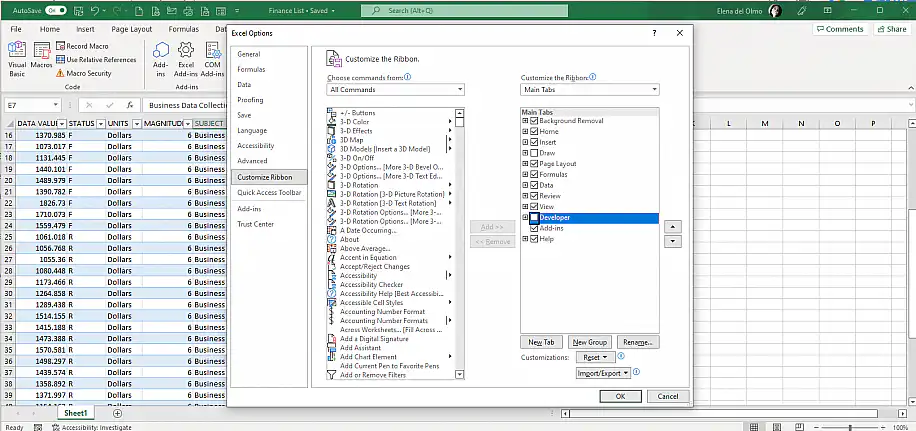
3. Tick the “Developer” option and then “OK” to automatically enable this tab on your Ribbon. The VBA feature should be included automatically in newer Excel versions.
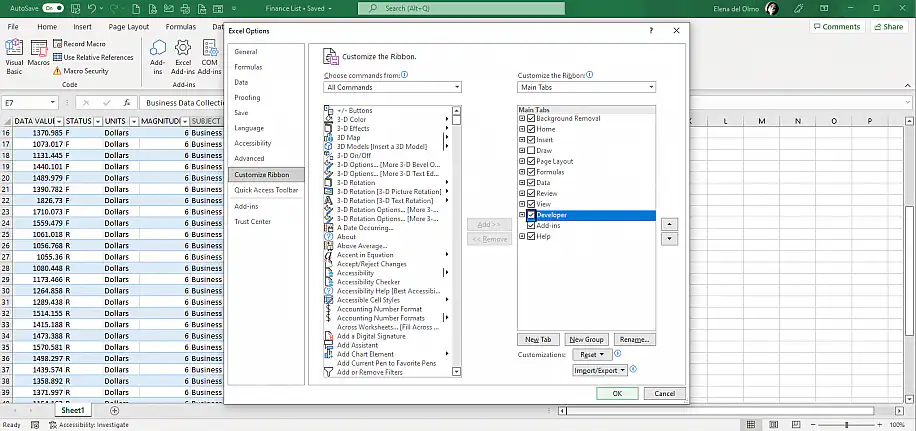
4. Go to your new “Developer” tab in your Ribbon, and then click on the “Visual Basic” button.
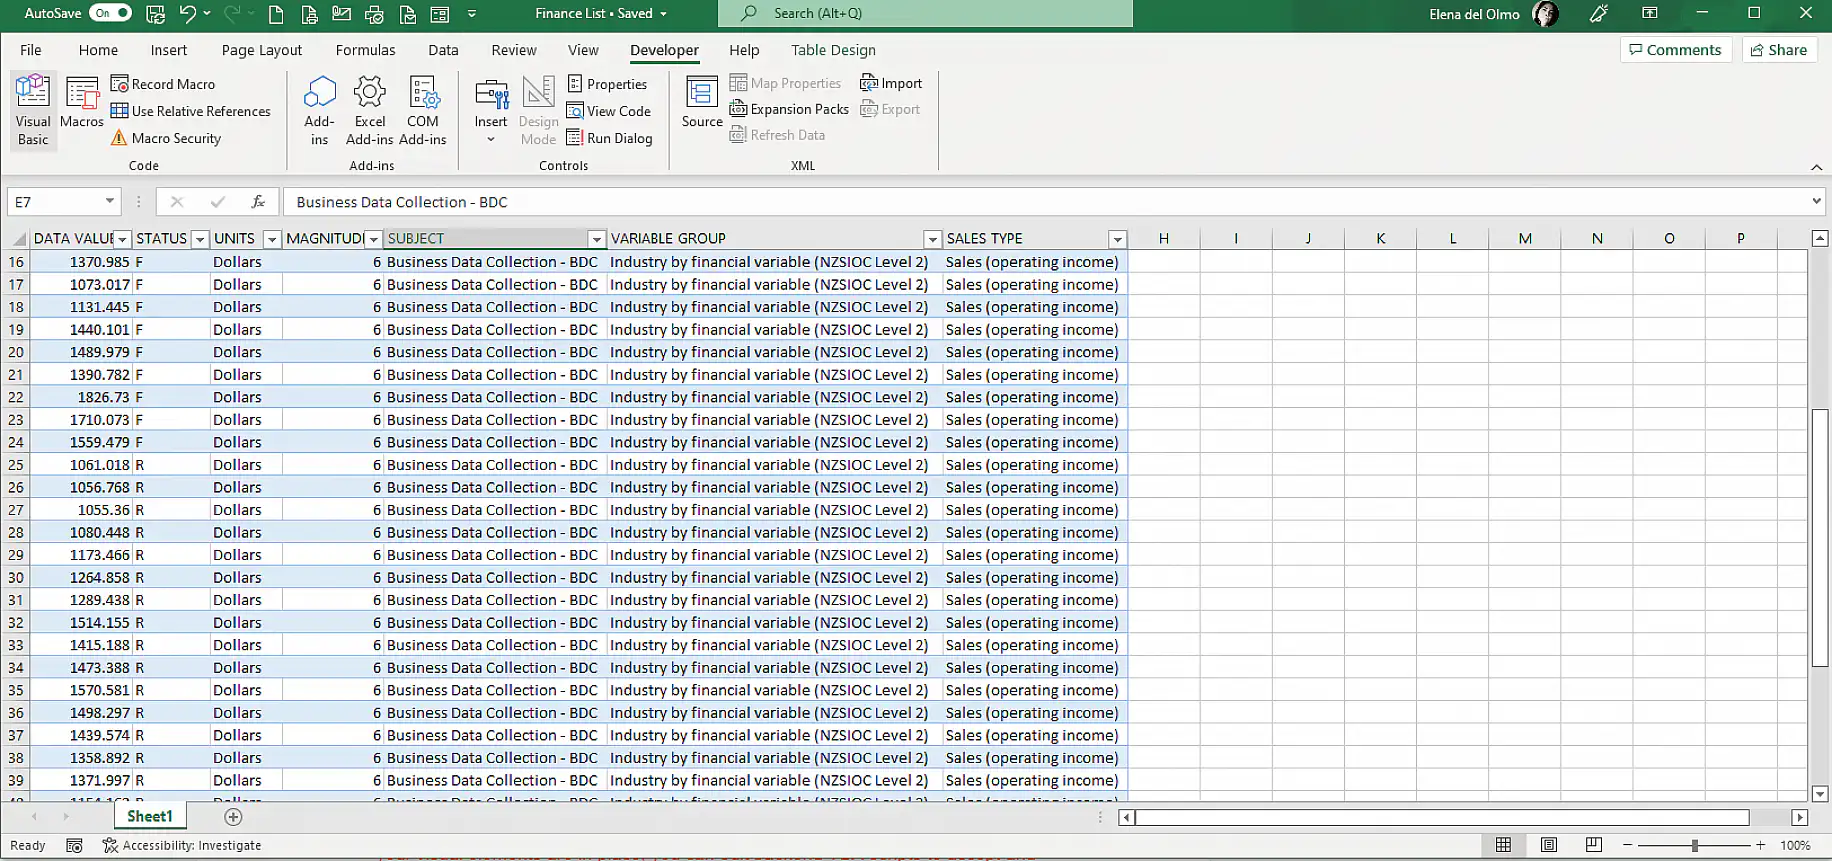
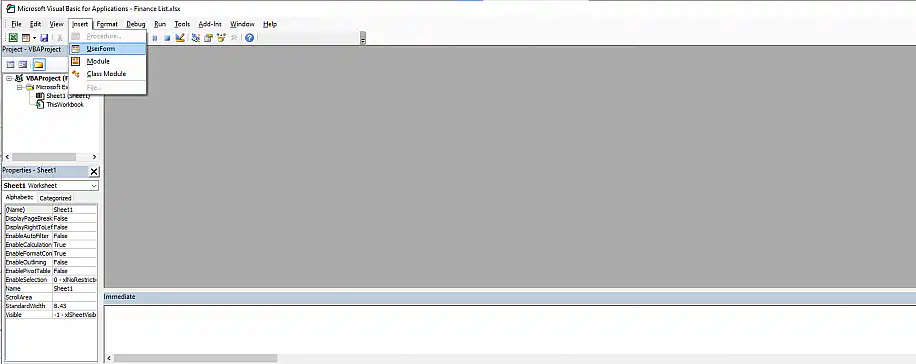
5. Excel will automatically launch the VBA window. Go to “Insert” and then select “UserForm”.
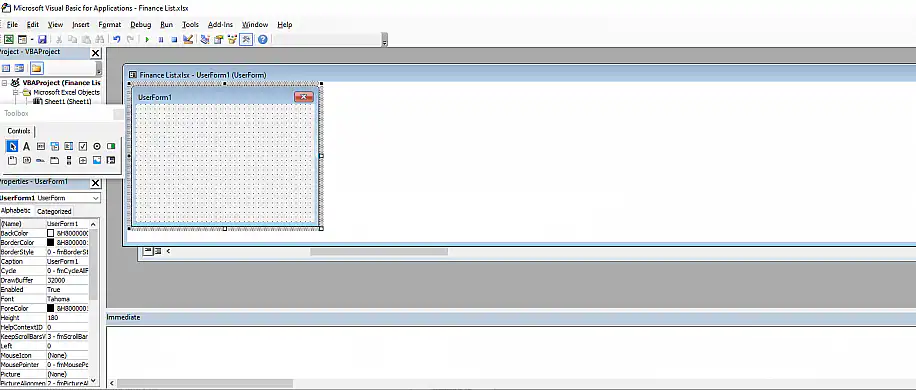
6. You’ll find a small “Toolbox” window and the “UserForm” to the right. This is the space where you can create your own by including any elements you wish.
7. Select one of the elements from the “Toolbox” and drag it to the “UserForm1” box. Here, we have selected the “A” button to create a “Label”.
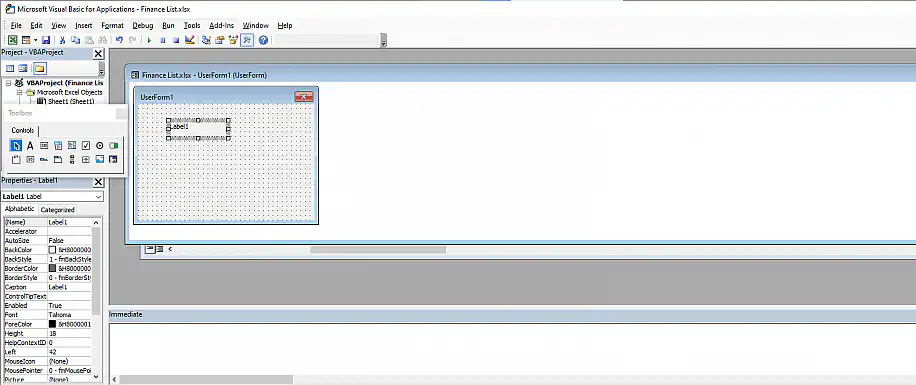
To change the name of the “Label” simply double-click on it. This same system can be used for any of the remaining elements, including text boxes, lists, or commands. To save your work, you will need to save the Excel file as a macro-enabled workbook, i.e., in “.xlsm” format.
How to make an automated data entry form in Excel with Power Automate
To create a data entry form in Excel using Power Automate, you first need to make sure the data is stored in Excel online and in table format.
1. Launch Power Automate and click on “Create” and then “Instant cloud flow”.
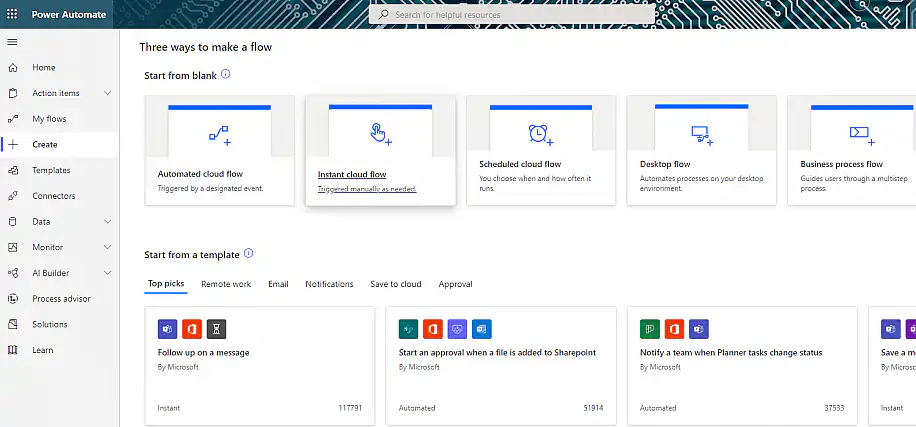
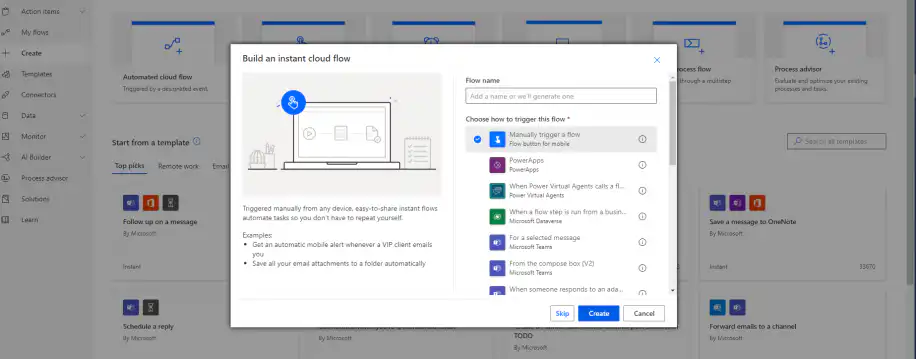
2. Select “Manually trigger a flow” from the options.
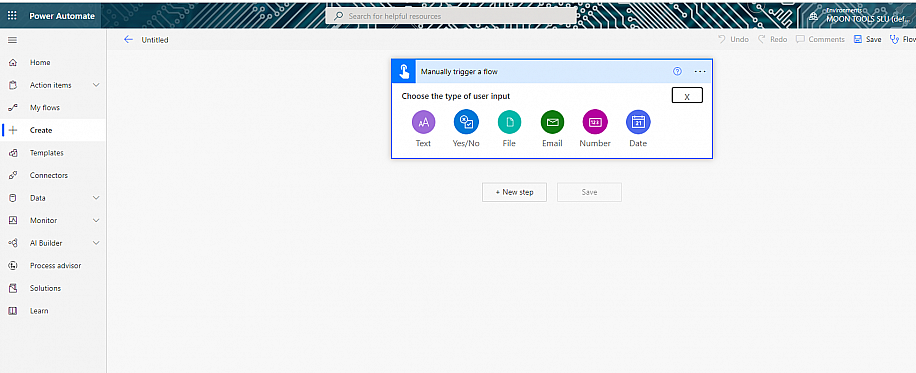
3. Click on “Manually trigger a flow” to access the “Add an input” option.

4. Select the type of data to enter.
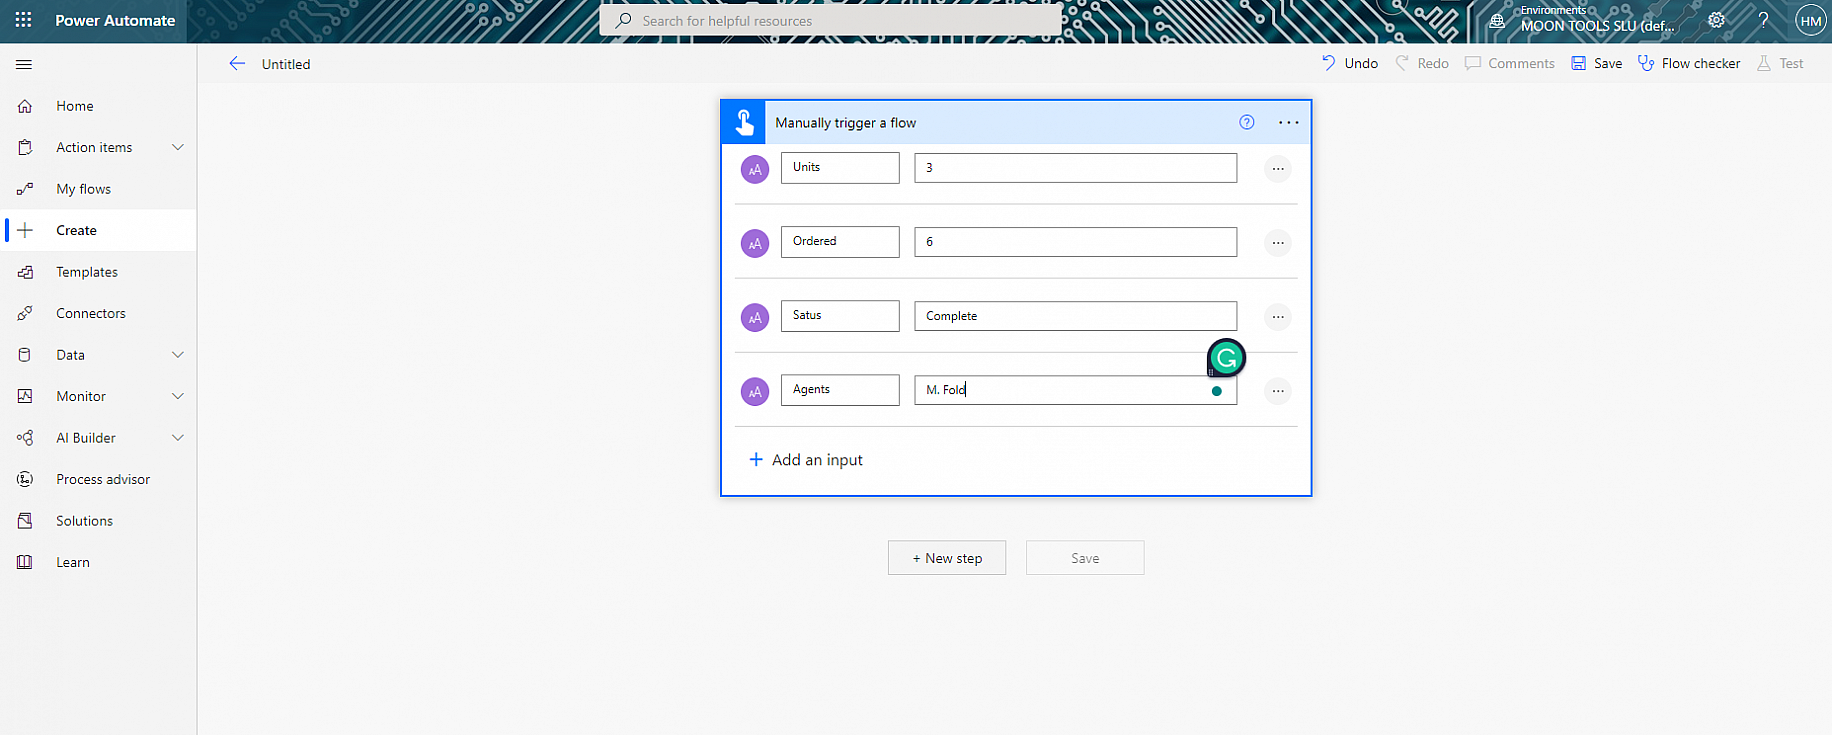
5. After each data entry type, you can click on the vertical ellipsis icon to create an Excel data entry form with a drop-down list. Once you finish, click on “New Step”.
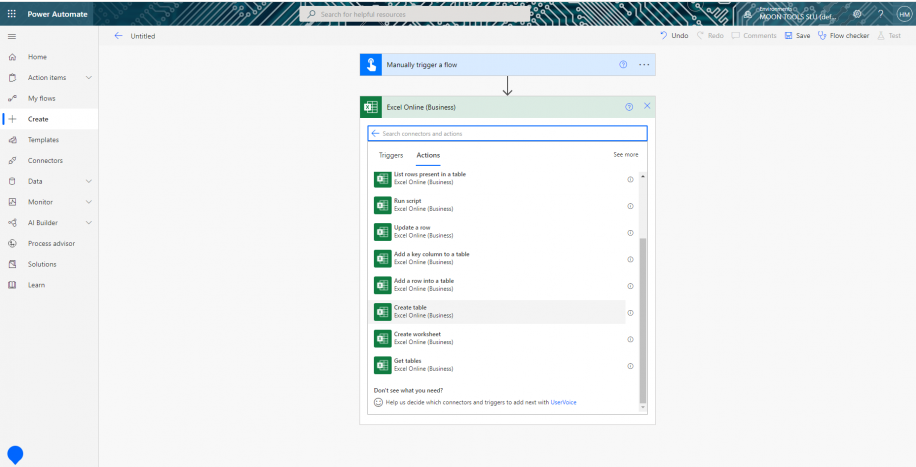
6. Select “Excel Online (Business)” and then “Create table” from the “Actions” tab. This will connect your form with the spreadsheet you’d like to enter data in.
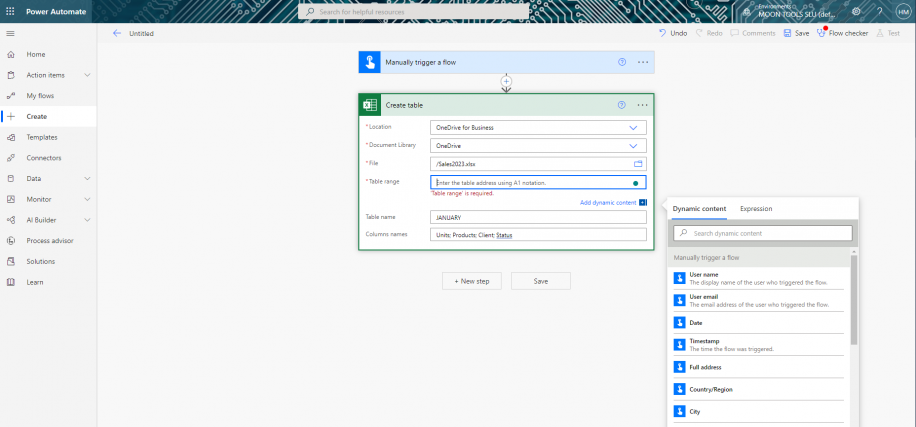
7. Add the “Location”, “Document Library”, the name of the “File”, and the “Table range” where your form is created. Note that the “Column names” will need to be input using a semicolon as a separator. Once you finish, click “Save”.
You’ll see how Power Automate recommends testing the flow. To test, simply click on the “Test” button to the far right.
How to create a data entry form using macros?
Macros can be used in Excel to automate tasks that are usually very time-consuming, such as manually entering large datasets in a spreadsheet. The great thing about using VBA Macros is that you can do it straight from your spreadsheet. From creating tables to connecting your spreadsheet with external data sources, this feature offers limitless possibilities in task automation.
To get a more profound understanding of how it works, check out our guide on how to use macros in Excel to automate tasks.
Excel data entry form examples and templates
The built-in Form button works on any range with a header row, so the quickest way to start is with a table you already keep. Some tables that work well with it:
- An inventory log with item, SKU, quantity, and location, where each stock movement is one record.
- An expense list with the date, category, amount, and receipt number of each purchase.
- A customer contact list that grows as new leads come in.
- A timesheet where each row holds an employee, a date, a project, and the hours worked.
If you’d rather not build the table yourself, start from a template. In Excel, go to File > New and search the template gallery for a term such as “inventory” or “expense.” You can also download this inventory template in Excel or this expense tracker template for Excel. Once the template is open, click any cell in its table and then the Form button to add records.
The Form dialog shows up to 32 columns. For a wider table, build a UserForm with VBA instead, as shown above.
Conclusion
Excel is the go-to solution for data storage and management. However, inputting the data is the first and crucial step in any process. If you work in inventory management or a business with high-volume record-keeping, then you’ll most certainly benefit from automation tools in Excel.
Automating Excel functions is possible through powerful integrated features such as VBA, Macros, and Power Automate. You should now feel comfortable with these tools and have the necessary know-how skills to create a data entry form in Excel using 4 easy but powerful ways.
After a few weeks of entries, check the table for repeated records, since the same entry often gets typed twice. You can remove duplicates in Excel in a few clicks. If your team works in Google Sheets instead, a Google Form does the same job and sends each response to a new row. Follow these steps to create a Google Form.
When the records you collect end up spread across several Excel files, Sheetgo, an AI-powered data automation platform, can combine them into one workbook on a schedule, so your data stays organized and AI-ready.



 English
 Español
 Português do Brasil
 Français