




Macros are a great tool to automate repetitive tasks in Excel. By implementing key macros into your spreadsheet, not only do you streamline the production and management of your data through automation, but you also avoid tasking manual inputs, such as dealing with complex formulas. Overall, macros cut your turnaround time and manual effort.
In this article, we’ll show you how to use macros in Excel to automate your workflow. You’ll learn how to make, build or create your own macros in Excel and how to add macros in Excel, so you can get the best custom functionality to automate the processes that will make your work life easier.
What are macros in Excel?
A macro is an action or a group of actions that will complete automatically according to your specifications.
Macros (Microsoft Office Macros) are a very powerful tool for automating predictable, repetitive tasks in your office workflow. A macro is a piece of Visual Basic for Applications (VBA) code that is saved inside your document. Once you know how to use (and create) them, you’ll find you can apply macros to a wide range of tasks to free up time to focus on the deep work that will really set your business apart.
There are many different circumstances in which you’d want to use macros to automate parts of your work. Here are just some examples:
- Changing the style and formatting of your data.
- Creating new documents.
- Linking with other data sources (databases, text files, and more).
- Altering data and text.
If you’ve never used macros before, Sheetgo’s AI automations might be a good alternative for you. They connect your spreadsheets and keep them updated on a schedule, with no VBA code to write. For more options, see our guides to Excel automation and Power Automate for Excel.
How to create macros in Excel?
Before you can start using macros in Excel, you need to create one. Here’s how.
Let’s say you want your workbook to automatically total the data from each row and the format and style to be consistent for all your workbooks. Instead of wasting time on these tedious actions, you can build a macro to do this for you without the risk of human error.
1. Open your Excel workbook containing your data. In the toolbar, click View > Record Macro.
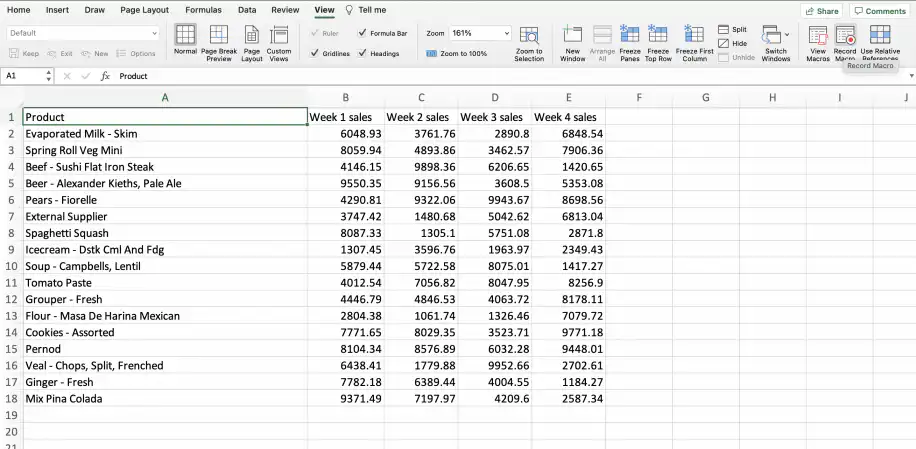
2. Name your macro (one word only, no spaces). You can also choose to assign a keyboard shortcut for your macro and add a description (here, you can add anything such as an overview of what the macro does or when you should use it). Click “OK”.
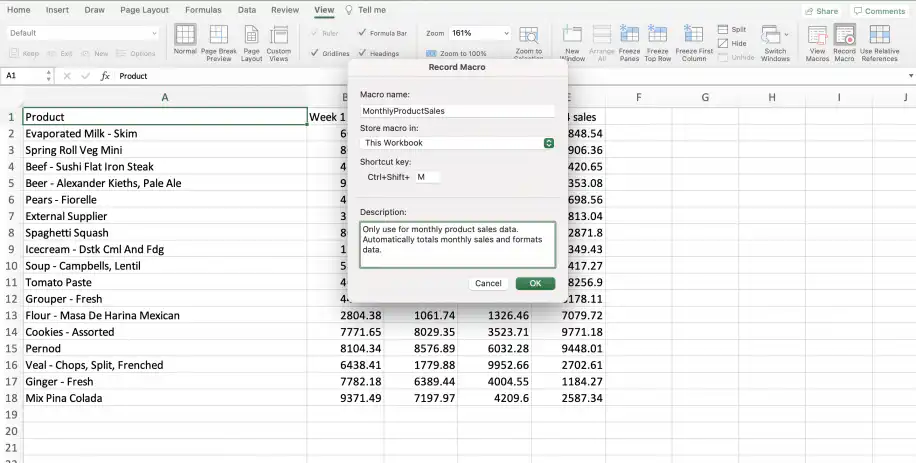
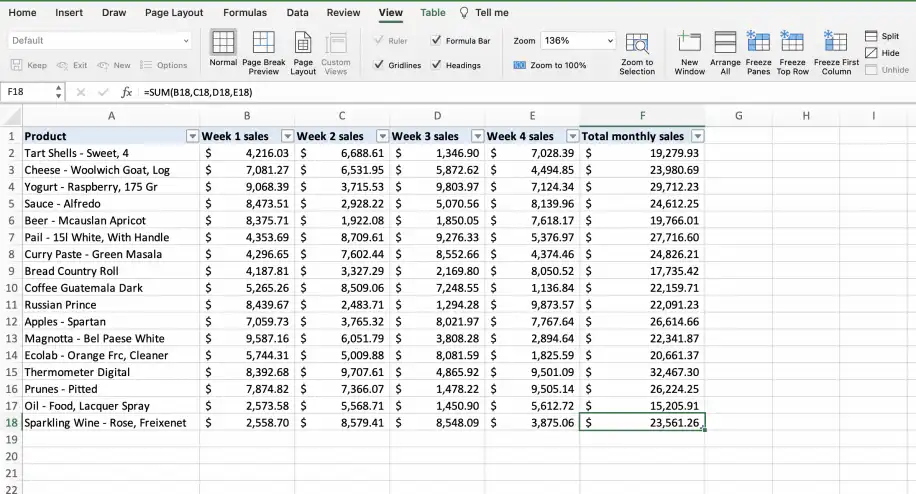
3. Now carry out all of your desired actions. The macro will record everything you do. Here is an example of the changes I want to make to my Excel; adding a new column for total sales, adding currency formatting to my columns, and formatting the header rows. You can also add formulas and other numbers, text, and cell formatting to your dataset.
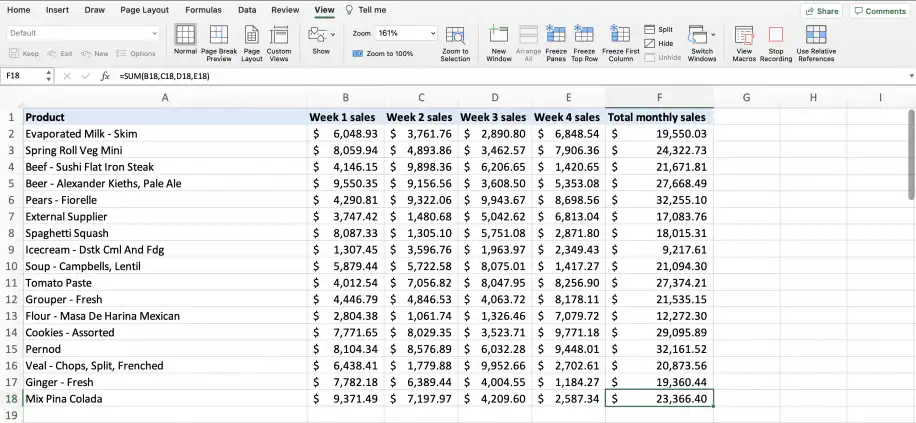
4. Once you have applied all of your changes, click “Stop recording” in the “View” menu.
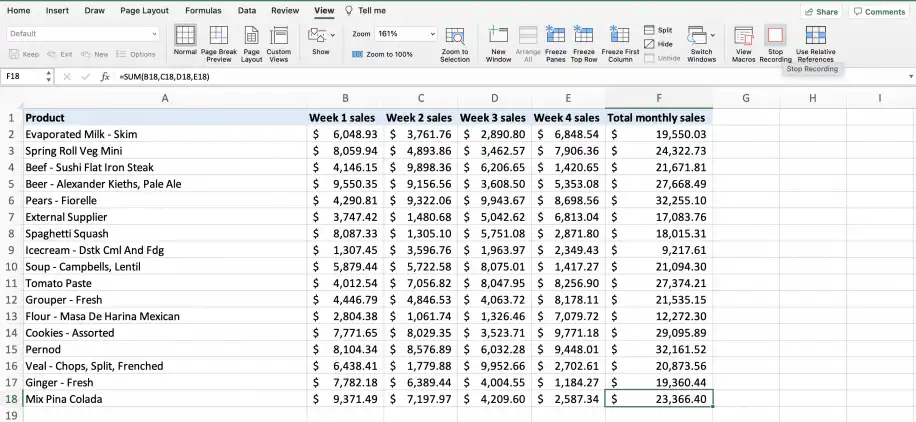
Please note: An alternative way to stop recording a macro is to click the icon in the bottom or top left-hand corner of your workbook (depending on whether you have the Excel app or the online version).
How to use macros in Excel?
Before you can use the macro you’ve just created, it’s vital that you perform the following steps; delete your cells, then save the file in a macro-enabled format.
You must delete your data before saving as, otherwise, when you run the macro, it will remember this specific data and add it to any future workbooks. Deleting this data now means that the macro will only remember the actions, not the data.
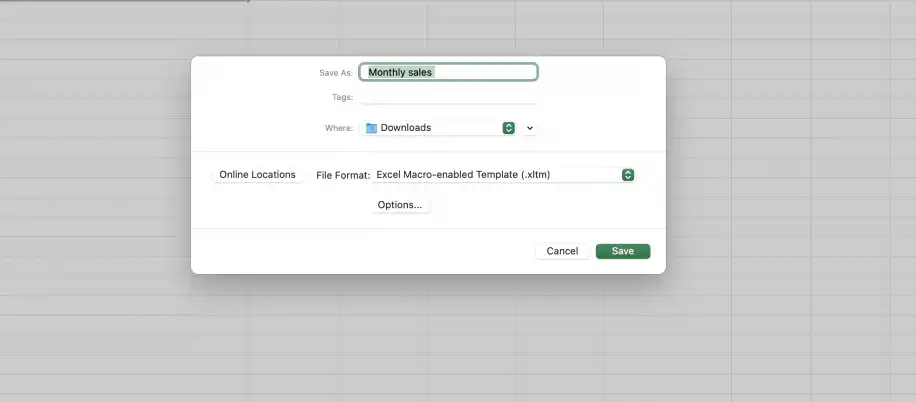
You then have to save the workbook in a macro-enabled format – ideally XLTM. If you save it as another format, like XLTX, the macros won’t be able to run.
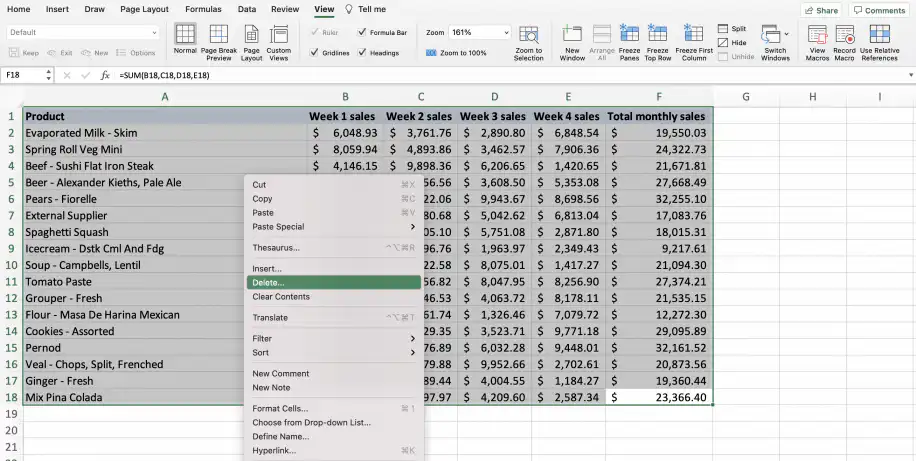
1. Select all of your data and delete your cells. Right-click and select “Delete” – this is the only way to delete all values and formatting.
2. Save as a macro-enabled format by heading to File > Save as. Choose the “Excel Macro-enabled Template” (XLTM) or a macro-supportive alternative. Click “Save”.
How to run macros in Excel?
Depending on how you assign it, you may be able to run macros by pressing a combination shortcut key, a button on the Quick Access Toolbar, or in a custom group on the control ribbon. You can also assign a macro to run automatically when you open your Excel workbook.
Now that you’ve created a macro-enabled template, it’s time to run it. Here’s how:
1. Open your newly-created Excel template file. With standard security settings, you will see a warning notification stating that macros are disabled. You should click “Enable Macros”.

Please note: You may not always want to enable content. If you receive a file from a third party, for example, they may be running a macro that could damage or delete your data. This one is safe, however, as we created it ourselves.
2. Import your data into the workbook. You can import from another Excel file or other formats like CSV. In the toolbar, click Data > Get Data and choose the option that best suits your needs.
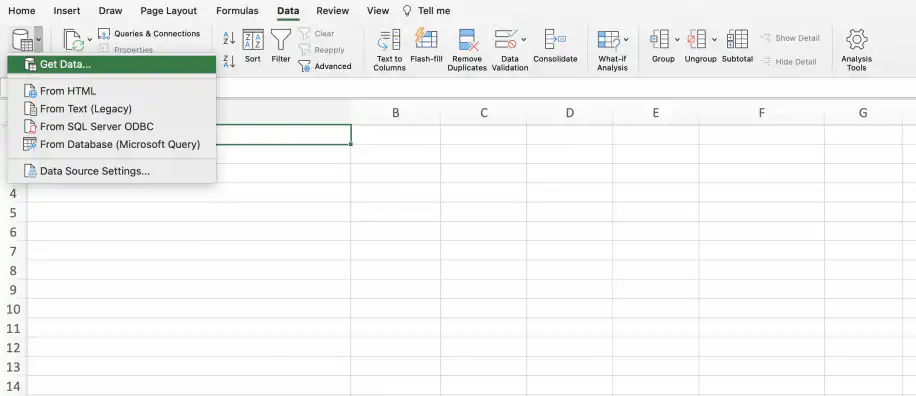
In this example, I’ll select “Get Data…” to import data from another Excel file. Once I’ve located my Excel file, I’ll click “Get data”.
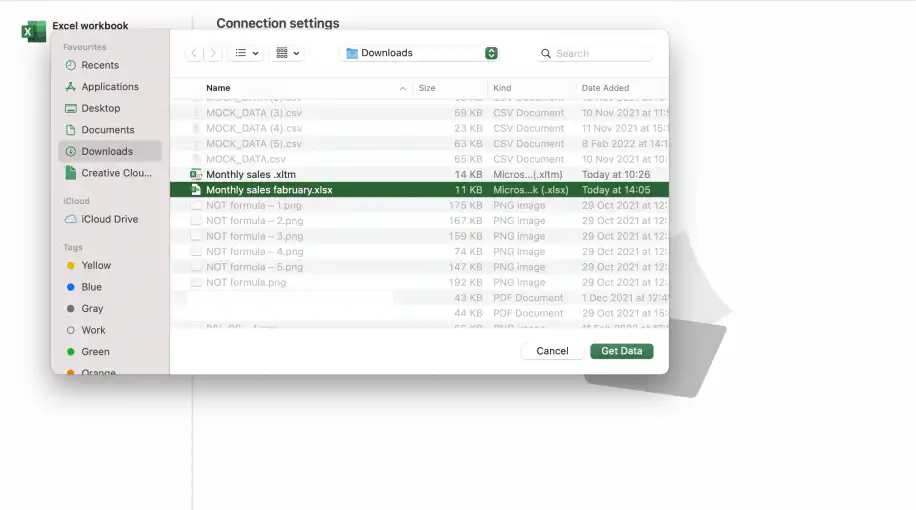
3. Click the checkbox of the sheet(s) you want to import. When finished, click the “Load” button in the bottom-right corner of the window.
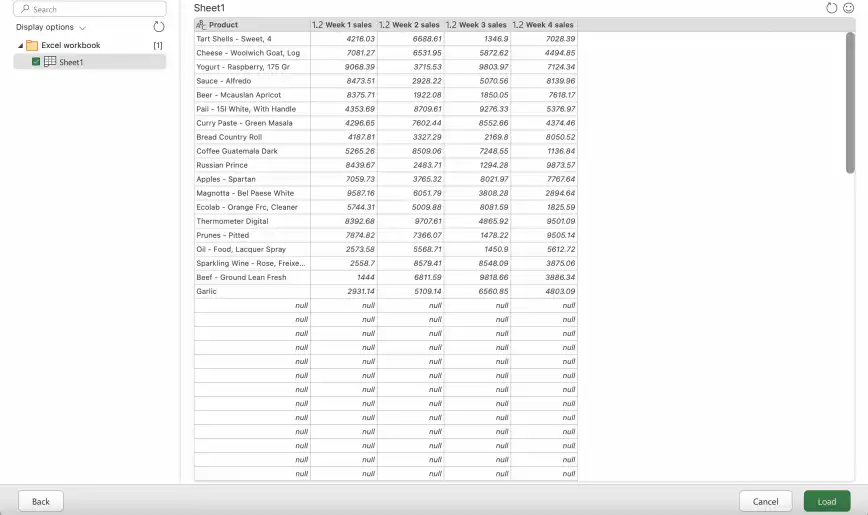
4. Now that your data is in the spreadsheet, go to View > View Macros. Click on the macro you created previously and click “Run”.
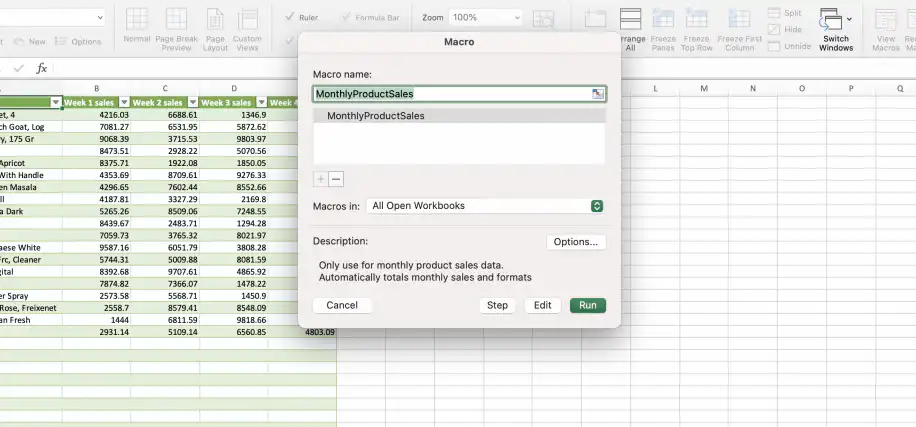
Alternatively, if you added a keyboard shortcut for your macro, press the combination now to run the Macro.
As you can see from the screenshot below, the macro has automatically applied the actions previously recorded. My new data now has a new ‘Total monthly sales’ column, currency formatting has been applied to my columns, and the headers have also been formatted.
Conclusion
Although macros are not widely known or used by the majority of Excel users, they are an incredibly intelligent feature that could streamline the day-to-day operations of many Excel users. What’s more, we’ve seen that macros aren’t as intimidating to set up and run as they might seem.
Here we’ve shown how you can create/record macros in your spreadsheet, how to save them correctly, and how to run them on other datasets. If you would rather not record or edit VBA, Sheetgo’s AI automations can take over repetitive spreadsheet tasks across your files.
Looking for more articles on how to make the most of Excel? Take a look at how to transfer data from one Excel worksheet to another automatically.



 English
 Español
 Português do Brasil
 Français